Installation
Install Python
To install Python, follow these steps:
- Go to the Python download page at https://www.python.org/downloads/.
- Choose the latest stable version of Python for your operating system (e.g. Windows, macOS).
- o install Python on a Linux system,
sudo apt install python3 - I would prefer Python 3.11.3, It's a stable version having a lot of bug and security fixes. It's support will end in 2027-10.
- Click the appropriate installer link to download the installation file.
- Once the download is complete, run the installer file.
- Follow the prompts in the installer to complete the installation process.
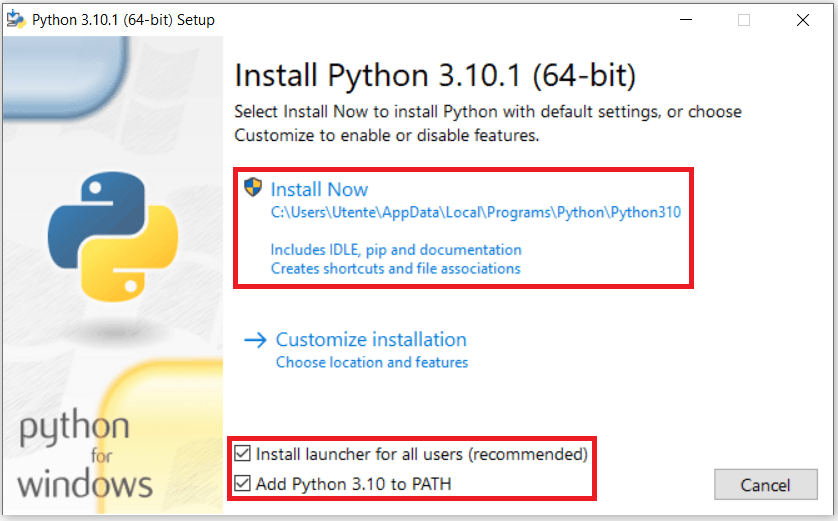
On Windows, you may need to add Python to your PATH first.
You can check a box during installation for adding Python in PATH automatically.
After installation, you can open the Python interpreter by typing python in the command line You can also write and run Python code using a code editor or IDE (integrated development environment), such as Visual Studio Code, PyCharm, or Sublime Text.
Virtual Environment
A virtual environment (also known as a virtualenv) is a tool used in Python development to create isolated environments for each project. These isolated environments contain their own copy of Python and all necessary packages and dependencies, which can be different from those installed globally on the system. This allows for better management of dependencies and avoids conflicts between packages across different projects.
When you create a virtual environment, it creates a new directory that contains a copy of the Python interpreter, as well as a copy of the pip package manager and a set of standard Python modules. You can then install packages and dependencies specific to your project within this environment, without affecting other Python projects on the same machine.
Activating a virtual environment modifies the environment variables in your shell so that the Python interpreter, pip, and other command-line tools use the version of Python and packages installed within the virtual environment.
How to Create Virtual Environment
To create a virtual environment for a Python project, follow these steps:
Open a command prompt or terminal window.
Navigate to the directory where you want to create your virtual environment.
Run the command python -m venv env to create a new virtual environment. You can replace "env" with any name you choose for your environment.
Once the command completes, you should see a new directory named "env" (or whatever name you chose) in your current directory. This directory contains the files and directories that make up your virtual environment.
How to Activate it.
To activate the virtual environment:
- On Windows, run the command
env\Scripts\activate.batfrom the command prompt. - On macOS or Linux, run the command
source env/bin/activatefrom the terminal.
After running the activation command, you should see the name of your virtual environment appear in the command prompt or terminal prompt, indicating that the virtual environment is active.
How to Exit Virtual Environment.
To exit the virtual environment, you can run the command deactivate from the command prompt or terminal.
Install Django
To install latest stable version, run the command pip install django
Wait for the installation to complete. Once complete, you should see a message indicating that Django has been successfully installed.
Check Django Version
To check the version of Django installed on your system, Run the command django-admin version.The command will display the version number of Django installed on your system.
Alternatively, you can also check the version of Django in your Python code. To do so, open a Python interpreter or a Python file and enter the following code:
import django
print(django.get_version())
Start Project
After installing Django, you can start a new project by running the command django-admin startproject projectname, where "projectname" is the name you choose for your project. This will create a new directory with the specified name, containing the basic structure of a Django project.
Start the Development Server
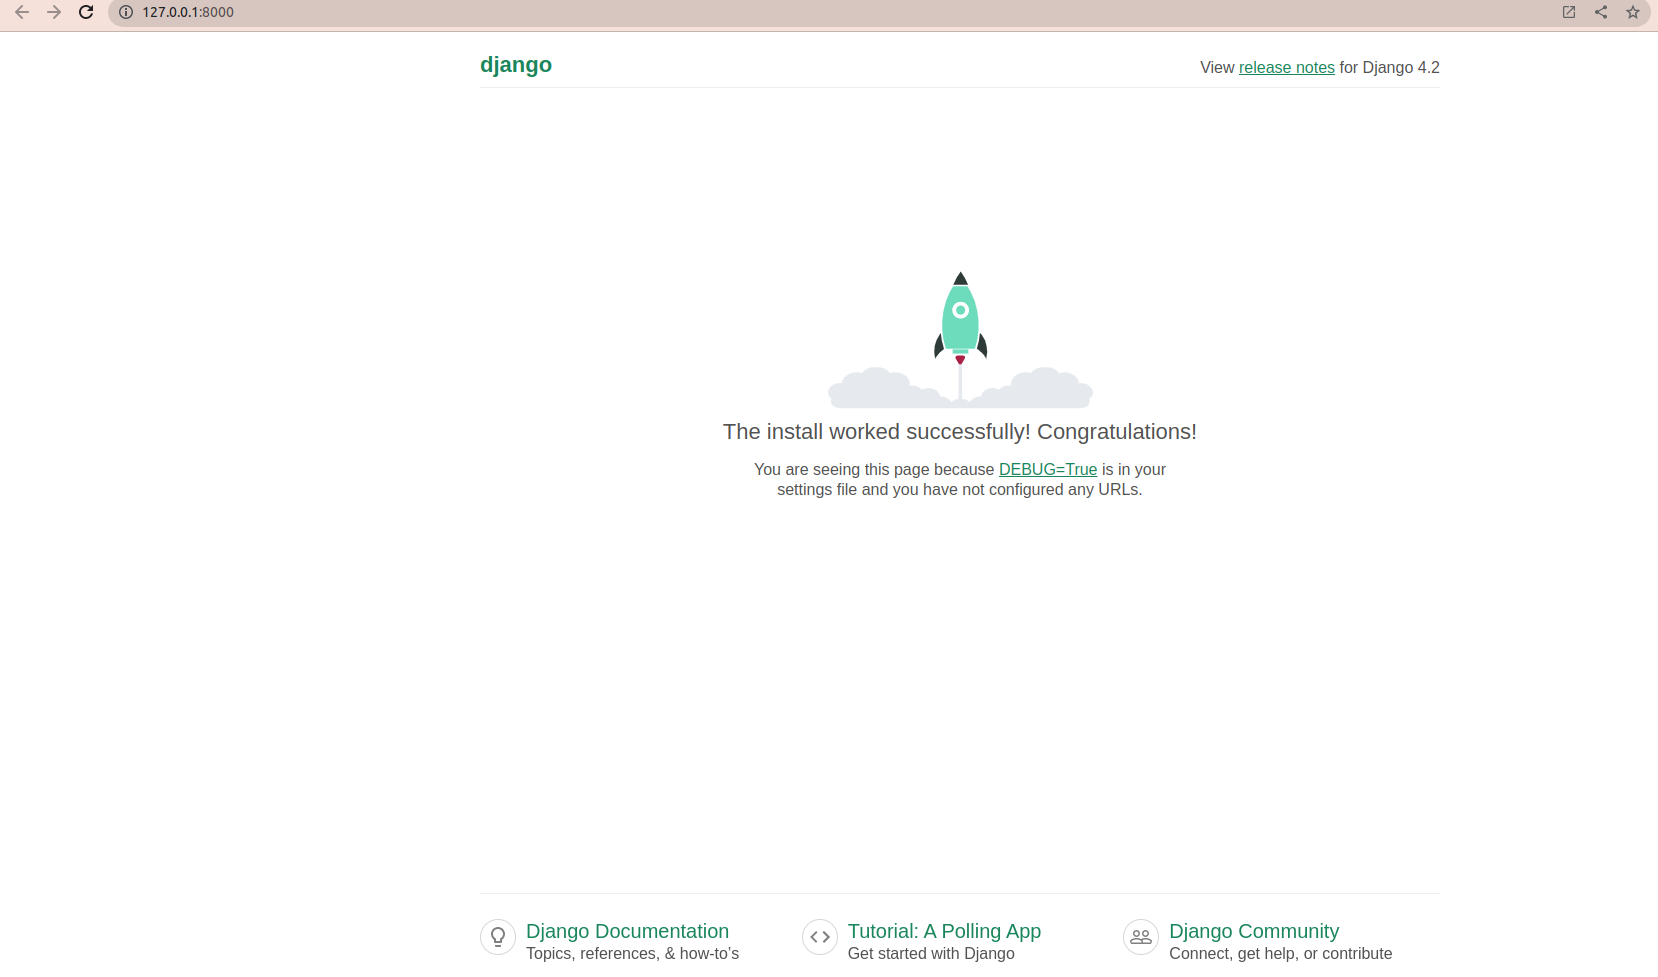
To start the development server, navigate to the project directory and run the command python manage.py runserver. This will start the development server on your local machine, allowing you to view the project in your web browser at http://127.0.0.1:8000/.
The install worked successfully! Congratulations!
Directory Structure
├── db.sqlite3
├── manage.py
└── myProject
└── ├── asgi.py
└── └── **init**.py
└── └── **pycache**
│   └── ├── **init**.cpython-38.pyc
│   └── ├── settings.cpython-38.pyc
│   └── ├── urls.cpython-38.pyc
│   └── └── wsgi.cpython-38.pyc
├── settings.py
├── urls.py
└── wsgi.py

2 directories, 11 files