Let's Start
Let's Start
Congratulations! In the previous docs, you learned about React and its features. Now, it's time to start coding. In this doc, you will learn how to create a new React project and display HTML code in the browser. We will use create-react-app to create a new React project.
What is create-react-app?
create-react-app is a command-line tool that allows you to create a new React project with a single command. It sets up a basic project structure and configures everything you need to get started with React development. It also installs all the dependencies required for the project.
There are a few other ways to create a React project, like using vite, webpack, or parcel. But create-react-app is the most popular and easiest way to create a new React project.
To get started with React, you'll need to have a basic understanding of JavaScript and some familiarity with HTML and CSS. You'll also need to set up a development environment on your computer, which typically involves installing Node.js (a JavaScript runtime) and a package manager like npm or yarn.
Once you have your development environment set up, you can create a new React project using a tool like create-react-app, which will set up a basic project structure and configure everything you need to get started.
Prerequisites
Install Node.js if you haven't already. You can download it from the official website https://nodejs.org/en/download/prebuilt-installer. Node.js is a JavaScript runtime that allows you to run JavaScript code outside of a web browser, and we'll be needing it to run our React applications.
If you already have Node.js installed, you can check the version using node -v.
Once you install Node.js, you will also get npm installed automatically. You can check the version of npm using npm -v.
Step 1: Create Project
npx create-react-app my-project
It will create a new folder called my-project in the current directory. It will also install all the dependencies required for the project. This might take a few minutes.
Folder structure of the project will look like this:
my-project
├── public
│ ├── favicon.ico
│ ├── index.html
│ ├── logo192.png
│ ├── logo512.png
│ ├── manifest.json
│ └── robots.txt
├── src
│ ├── App.css
│ ├── App.js
│ ├── App.test.js
│ ├── index.css
│ ├── index.js
│ ├── logo.svg
│ └── reportWebVitals.js
├── README.md
├── node_modules
├── package.json
└── .gitignore
For now, ignore all the files and folders except src/App.js and src/index.js. These are the files where we'll be writing our code.
Step 2: Navigate to Project Directory and View Project
Navigate to the project directory:
cd my-project
Step 3: Start Server
Start the development server:
npm start
This will open a new browser window with a running React application. You can now begin writing code in the src directory of your project.
Now click on this link http://localhost:3000/. You would see a simple React app.
Step 4: Edit the Project
I am opening a project in VS Code. You'll see these folders and files
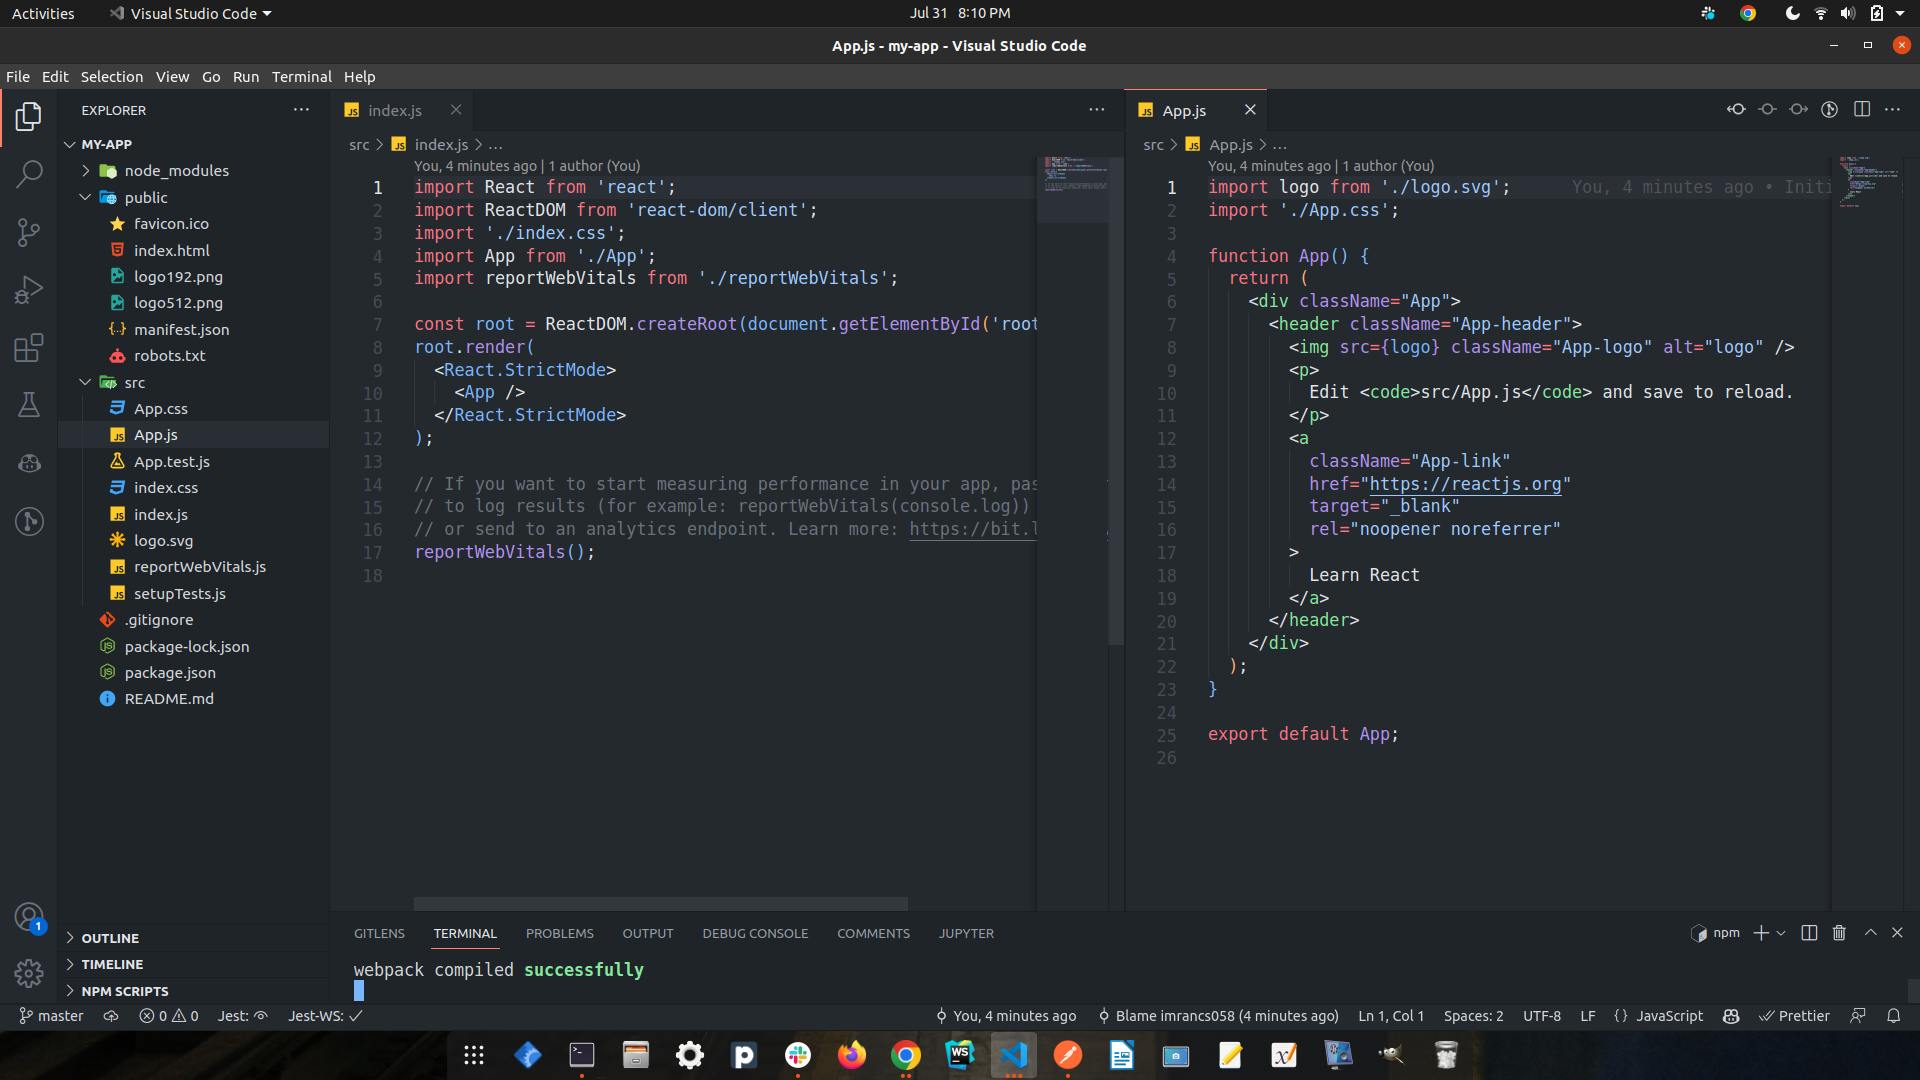
In the src folder, there is a file called index.js. This is the file from where the project starts. You see by default there's a component called App, that is the root component of the app. In index.js, app.js is imported and then the app is rendered.
What is Rendering?
You will hear the term rendering a lot in React and other frameworks. So, what does it mean?
Rendering is a generic term, and it means different things in different contexts. Even in React, and web development, it has so much meanings depending on the context. In general, rendering means showing something on the screen. For example, if you have a button, and you click on it, then it will show a popup. So, when you click on the button, the popup is rendered on the screen. Similarly, when you open a website, the website is rendered on the screen based on the HTML and CSS code. So, rendering is the process of showing something on the screen based on the code.
Rendering also means generating HTML code based on JavaScript code. In React, when you write JSX code, it gets converted to HTML code. This process is called rendering. React has a virtual DOM, and when you write JSX code, it gets converted to virtual DOM elements. Then React compares the virtual DOM with the actual DOM and updates only the changed elements. This process is called reconciliation. So, rendering is the process of converting JSX code to HTML code and updating the DOM based on the changes.
src/index.js
import React from "react";
import ReactDOM from "react-dom/client";
import "./index.css";
import App from "./App";
import reportWebVitals from "./reportWebVitals";

const root = ReactDOM.createRoot(document.getElementById("root"));
root.render(
  <React.StrictMode>
    <App />
  </React.StrictMode>,
);

// If you want to start measuring performance in your app, pass a function
// to log results (for example: reportWebVitals(console.log))
// or send to an analytics endpoint. Learn more: https://bit.ly/CRA-vitals
reportWebVitals();
src/App.js
import logo from "./logo.jpg";
import "./App.css";

function App() {
  return (
    <div className="App">
      <header className="App-header">
        <img src={logo} className="App-logo" alt="logo" />
        <p>
          Edit <code>src/App.js</code> and save to reload.
        </p>
        <a
          className="App-link"
          href="https://reactjs.org"
          target="_blank"
          rel="noopener noreferrer"
        >
          Learn React
        </a>
      </header>
    </div>
  );
}

export default App;
Now you make changes in the file src/App.js and save it. You'll see the changes reflected in the browser. If you are on this doc that means you do know HTML, CSS, and javascript. Now you do some changes, change the text, add more tags, and save it. You'll see the changes reflected in the browser.
How React Works
In a typical React application, the src/index.js file is the entry point for the application. It is the first file that is executed when the application is loaded in the browser.
In index.js, the first thing that usually happens is the import of the necessary dependencies, such as React and ReactDOM. These dependencies are typically installed using a package manager like npm or Yarn.
Once the dependencies are imported, index.js typically contains a call to the ReactDOM.render() method. This method is responsible for rendering the root React component to the DOM.
Once the root component is rendered to the DOM, React takes over and handles all updates to the UI. When the state of the application changes, React re-renders the affected components and updates the DOM accordingly, providing a fast and responsive user experience.
ReactDOM.render()
The ReactDOM.render() function takes two arguments, the first is the HTML code and the second is the HTML element where the HTML code will be rendered, like this:
ReactDOM.render(html, element);
You can see this in action in the index.js file. The index.js file contains the following code:
ReactDOM.render(
  <React.StrictMode>
    <App />
  </React.StrictMode>,
  document.getElementById("root"),
);
The first argument is the root component, <App />. The second argument is the HTML element with an id of root. This is the element where the React application will be rendered.
But render where?
There is another folder in the root directory of your React project, named public. In this folder, there is an index.html file (public/index.html). This is the HTML file that is served to the browser when the application is loaded.
You'll notice a single <div> in the body of this file with an id of root. This is where our React application will be rendered. public/index.html looks like this:
<!DOCTYPE html>
<html lang="en">
  <head>
    <meta charset="utf-8" />
    <link rel="icon" href="%PUBLIC_URL%/favicon.ico" />
    <meta name="viewport" content="width=device-width, initial-scale=1" />
    <meta name="theme-color" content="#000000" />
    <meta
      name="description"
      content="Web site created using create-react-app"
    />
    <link rel="apple-touch-icon" href="%PUBLIC_URL%/logo192.png" />
    <link rel="manifest" href="%PUBLIC_URL%/manifest.json" />
    <title>React App</title>
  </head>
  <body>
    <noscript>You need to enable JavaScript to run this app.</noscript>
    <div id="root"></div>
  </body>
</html>
I removed the comments to make it more readable. You can see the <div id="root"></div> element on line number 16. This is the element where our React application will be rendered.
Means our all the React code will be rendered inside this <div> element in the public/index.html file.
Let's see how it works. For example, if you write the following code in the src/App.js file:
function App() {
  return (
    <div>
      <h1>Hello World</h1>
      <p>This is my first React App</p>
    </div>
  );
}
The App component is already imported in the index.js file. So, you can render it in the root node:
import App from "./App";

ReactDOM.render(App, document.getElementById("root"));
The result is displayed in the public/index.html file:
<!DOCTYPE html>
<html lang="en">
  <head>
    <meta charset="utf-8" />
    <link rel="icon" href="%PUBLIC_URL%/favicon.ico" />
    <meta name="viewport" content="width=device-width, initial-scale=1" />
    <meta name="theme-color" content="#000000" />
    <meta
      name="description"
      content="Web site created using create-react-app"
    />
    <link rel="apple-touch-icon" href="%PUBLIC_URL%/logo192.png" />
    <link rel="manifest" href="%PUBLIC_URL%/manifest.json" />
    <title>React App</title>
  </head>
  <body>
    <noscript>You need to enable JavaScript to run this app.</noscript>
    <div id="root">
      <div>
        <h1>Hello World</h1>
        <p>This is my first React App</p>
      </div>
    </div>
  </body>
</html>
You can see the App component is rendered inside the <div id="root"></div> element, and the result is displayed in the browser.
Example - Display a Paragraph
We already have a src/App.js file. This file contains the App component. The App component is the root component of the application. Let's display a paragraph in the App component.
src/App.js
function App() {
  return <p>Hello</p>;
}
You can modify the code in the editor and see the result in the browser.
The App component is already imported in the index.js file. So, you can render it in the root node:
import App from "./App";

ReactDOM.render(App, document.getElementById("root"));
The result is displayed in the <div id="root"> element:
<div id="root">
  <p>Hello</p>
</div>
Example - Display a Table with Two Rows having Two Columns Name and Age
Create a variable that contains HTML code and display it in the "root" node:
src/App.js
Let's modify the App component to display a table with two rows and two columns:
function App() {
  return (
    <table>
      <tr>
        <th>Name</th>
        <th>Age</th>
      </tr>
      <tr>
        <td>Rizwan</td>
        <td>26</td>
      </tr>
      <tr>
        <td>Elsa</td>
        <td>30</td>
      </tr>
    </table>
  );
}
The result is displayed in the <div id="root"> element:
<div id="root">
  <table>
    <tr>
      <th>Name</th>
      <th>Age</th>
    </tr>
    <tr>
      <td>Rizwan</td>
      <td>26</td>
    </tr>
    <tr>
      <td>Elsa</td>
      <td>30</td>
    </tr>
  </table>
</div>
Example - Create a form with two input fields and a button and display the values in the alert box
Let's create a form with two input fields and a button:
src/App.js
function App() {
  const onSubmit = (event) => {
    alert(
      `Form submitted => Name: ${event.target.name.value}, Age: ${event.target.age.value}`,
    );
    event.preventDefault();
    console.log("Form submitted");
  };
  return (
    <form onSubmit={onSubmit}>
      <input type="text" placeholder="Name" name="name" />
      <input type="number" placeholder="Age" name="age" />
      <button type="submit">Submit</button>
    </form>
  );
}
Play with the code and see how it works.
In the coming docs, you will learn how to use the React library to build a web application.
JSX - JavaScript XML
You will notice that React will use the extension .jsx for the files that contain JSX code. This is not a requirement, but it is a convention.
The JSX code looks like HTML code, but it is not HTML. It is a combination of HTML and JavaScript. It is used to create React elements. It is a syntax extension to JavaScript. It is similar to a template language, but it has full power of JavaScript. JSX gets compiled to React.createElement() calls which return plain JavaScript objects called "React elements".
JSX produces React "elements". We will explore rendering them to the DOM in the next section.
Code
You can get the code from here
Conclusion
In this doc, you learned how to create a React application using create-react-app and how to display HTML code in the browser. You also learned about JSX and how it is used to create React elements.