How to push code on GitHub
Introduction: Sharing Your Code with the World 🌍
You've built something amazing on your computer. Now you want to share it, back it up, or collaborate with others. GitHub makes this possible!
What is GitHub? 🐙
GitHub is like Google Drive for code - it stores your projects online so you can:
┌────────────────────────────────────┐
│  Why Use GitHub?                   │
├────────────────────────────────────┤
│  ✅ Backup your code               │
│  ✅ Share with others              │
│  ✅ Collaborate with teams         │
│  ✅ Track all changes              │
│  ✅ Showcase your work             │
└────────────────────────────────────┘
GitHub = Git + Hub:
- Git - Version control (tracks changes)
- Hub - Social platform (share & collaborate)
The Complete Workflow: Local to GitHub 🚀
Your Computer (Local)          GitHub (Remote)
┌──────────────────┐          ┌──────────────────┐
│  1. Write code   │          │                  │
│  2. git add .    │          │                  │
│  3. git commit   │          │                  │
└──────────────────┘          └──────────────────┘
        │                              ↑
        │  4. git push                 │
        └──────────────────────────────┘

                Now team can see your code!
What You'll Learn
By the end of this guide, you'll know how to:
✅ Create a repository on GitHub ✅ Connect local code to GitHub ✅ Push changes to share your work ✅ Create Pull Requests for collaboration ✅ Pull updates from the team
Before starting:
- Install Git (Download here)
- Create a GitHub account
Already done? Skip to Create a local git repository!
Install git and create a GitHub account
Follow the instructions here to install git on your machine (Windows, Mac, or Linux) if you don't have it already.
This guide uses Git on the command line only. While there are great Git GUIs (graphical user interfaces), learning Git commands first makes it easier to understand Git concepts and transition to a GUI later.
Most online Git resources and discussions also use the command-line interface.
Once you've done that, create a GitHub account, if you don't have one already.
Create a local git repository
Repositories (also known as repos) are the most basic element of GitHub. You can think of them as a project's folder. A repository contains all of the project files (including documentation), and stores each file's revision history. Repositories can have multiple collaborators and can be either public or private.
To create a new repository, first, you need to navigate to that folder on your computer. For example, if you want to create a new repository in folder named "my-project", you'll first need to navigate to the folder where you want to create the repository.
cd ~/Desktop/my-project
Once you're in the folder, you can create a new repository using the git init command in the terminal:
git init
This will create a new repository in the current directory. Basically, it will create a new folder named .git in the current directory. This folder contains all the git metadata for the repository. Mostly this is a hidden folder, so you won't be able to see it in your file explorer by default. It is recommended to not modify the contents of this folder, as it is managed by git.
Create a new repo on GitHub
If you only want to keep track of your code locally, and don't need collaboration, then you don't need to use GitHub (or any other code hosting service). But if you want to work with a team, you can use GitHub to collaboratively modify the project's code.
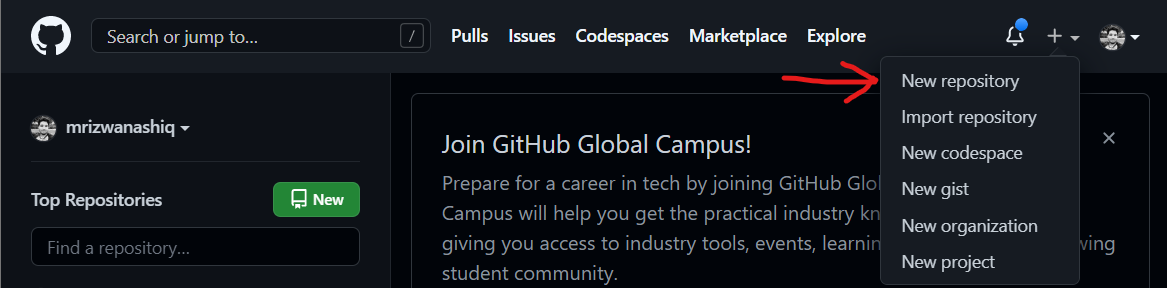
To create a new repo on GitHub, log in and go to the GitHub home page. You can find the New repository option under the + sign next to your profile picture, in the top right corner of the navbar:
After clicking the button, GitHub will ask you to name your repo and provide a brief description, as well as some other options like whether you want to add a README file, a .gitignore file, and a license. You can leave these options as they are, or change them as you see fit. You can also make your repo private or public. For now, I will leave them as they are:
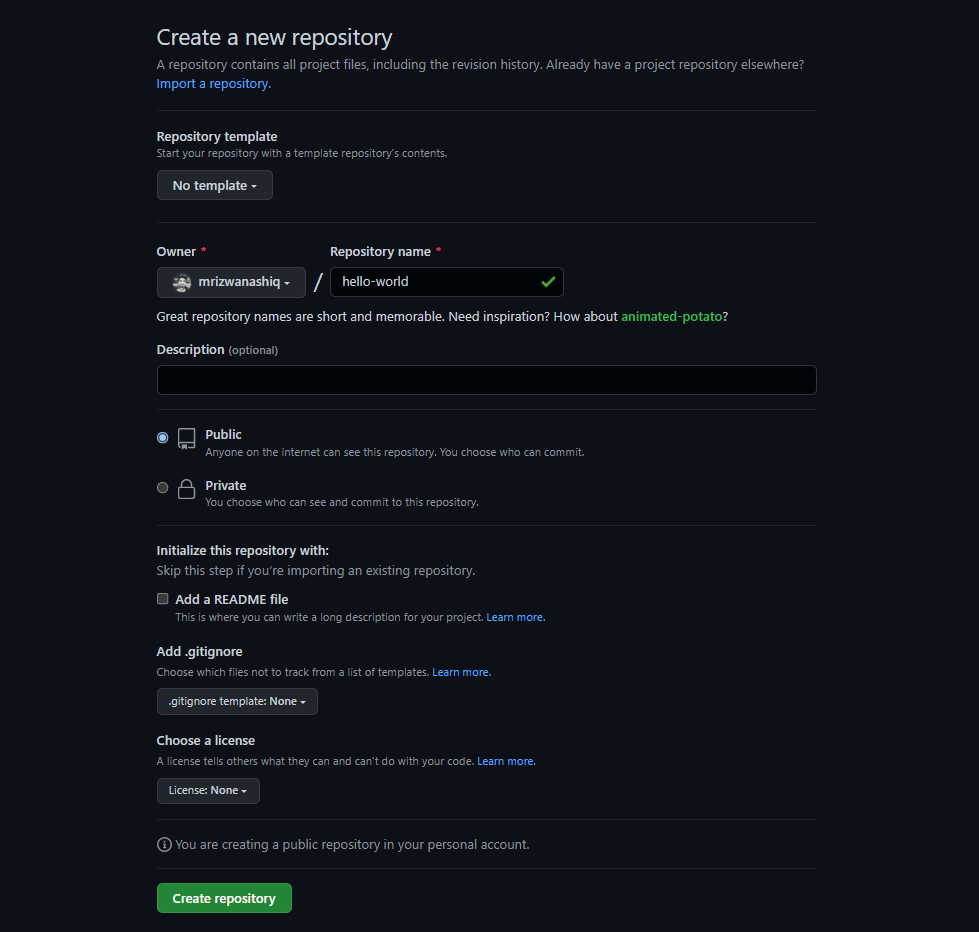
When you're done filling out the information, press the Create repository button to make your new repo.
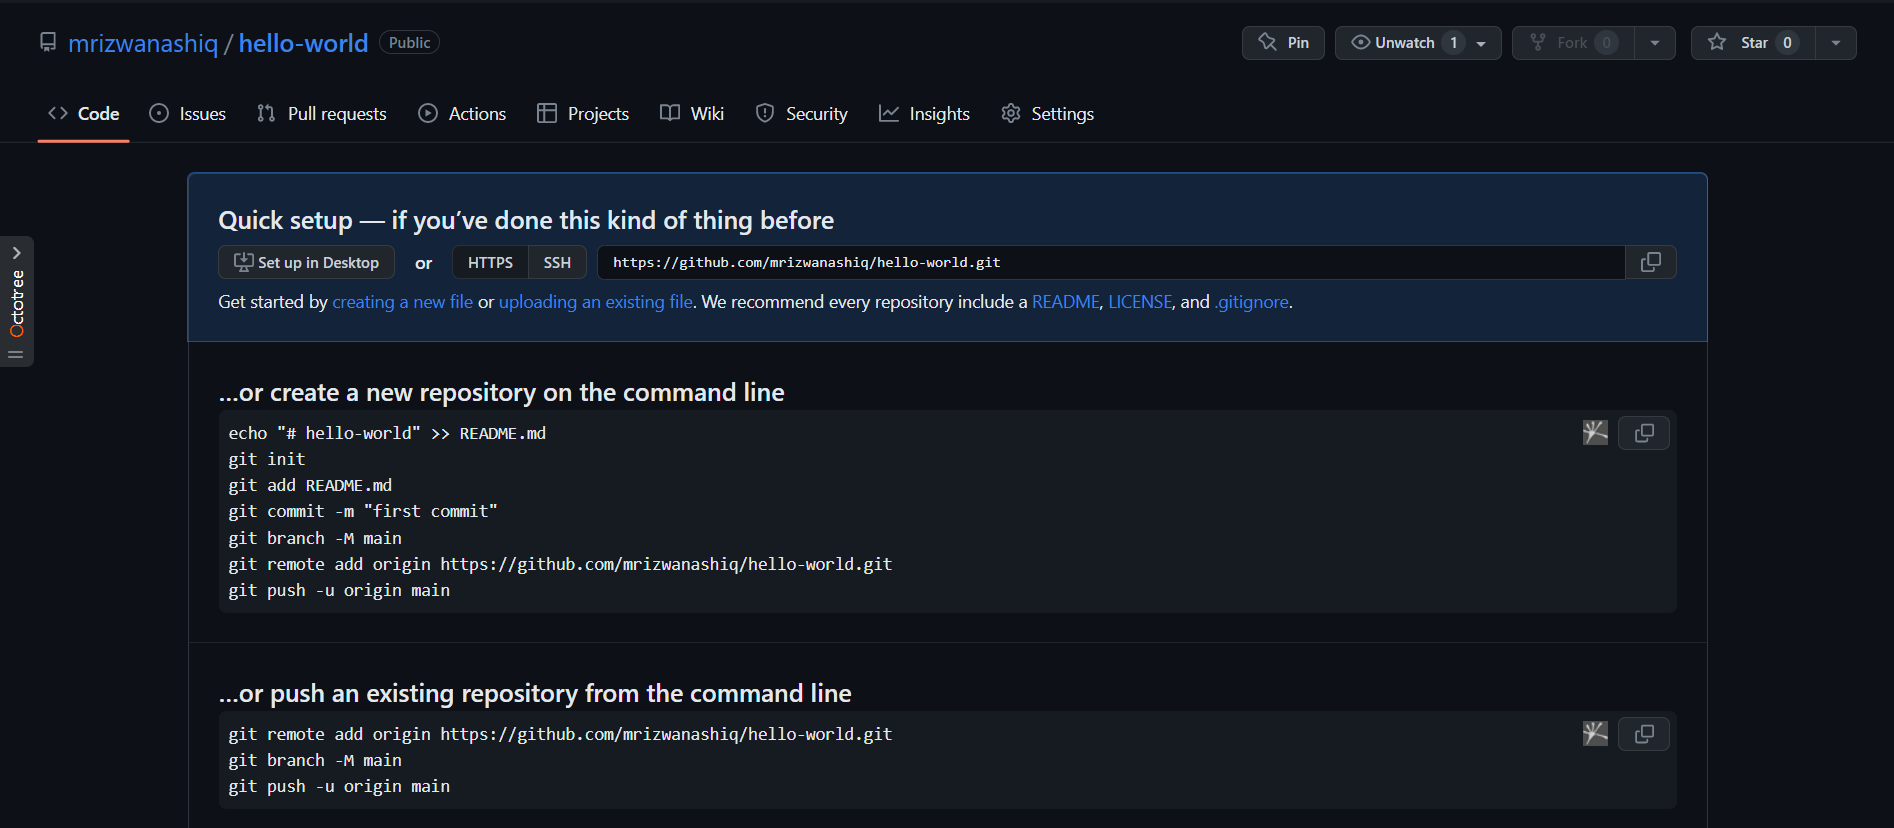
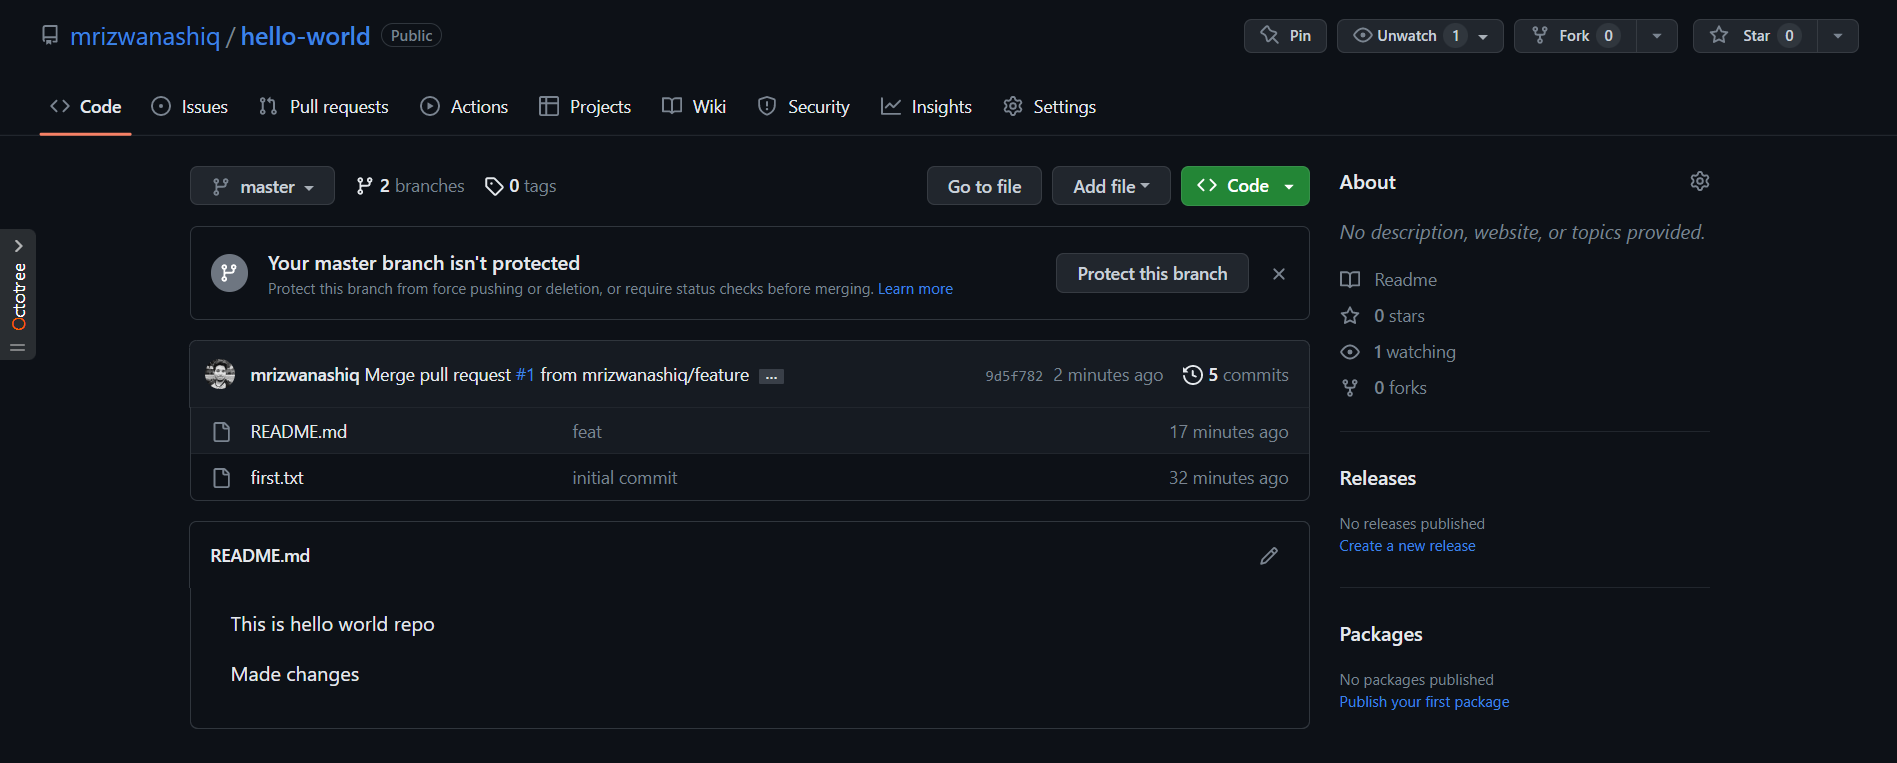
Repo will look something like this:
Now that you've created a new repo on GitHub, you can do one of two things:
- Clone the repo to your local machine and copy your existing code into it.
- Set remote origin to your local repo - this will allow you to push your code to GitHub.
Clone is a local copy of a remote repository. You can clone a repository from GitHub to your local machine using the git clone command.
Remote origin is a remote repository that you can push your code to. You can add a remote origin to your local repository using the git remote add origin command.
You can choose to do either of these things. But my preference is to do the second option in the case of new projects. If the remote repo already have some code in it, then I will go with the first option and clone the repo to my local machine.
But you can do whatever you want. It's your project.
I will go with the second option, because I already have a local repo and I want it to connect to GitHub.
Add remote origin to your local repo
You will see ...push an existing repository from the command line on the GitHub repo page.
Copy the command and run it in your terminal. It will look something like this:
git remote add origin https://github.com/mrizwanashiq/hello-world.git
This will add a remote named origin to the repository. The origin remote is where you'll push your code to. In short now your local repo is connected to GitHub and you can push your code to GitHub.
Instead of adding a remote to an existing local repo, you can clone the GitHub repo to your local machine:
git clone https://github.com/mrizwanashiq/hello-world.git
This creates a new folder named hello-world in the current directory with the repo contents. You can then cd into the folder and start working.
Add a file to the repository
Create a file in the project using any text editor. After creating the new file, you can use the git status command to see the repository status and track changes:
git status
You'll see that git knows that a new file exists, but it hasn't been added to the staging environment yet.
Add a file to the staging environment
The staging environment (or "staging" for short) and commits can be confusing for beginners. Here's a simple explanation:
A commit is a snapshot of your changes since the last commit. You make changes to your repo (adding or modifying files), then tell Git to save those changes as a commit. Commits form your project's history and let you jump back to any previous state.
How do you tell Git which files to include in a commit? That's where the staging environment comes in. When you modify files, Git notices the changes but won't automatically include them in a commit. You must first add files to the staging area using git add <filename>, then create a commit with git commit.
When you create a new file, Git notices it but doesn't automatically track it. To add a file to the staging environment, use the git add <filename> command:
Add all files
git add .
. denotes current directory, so eventually this will add all files (and folders) in the current directory to the staging environment.
In most cases, you'll want to add all files with git add .. However, you can also add specific files or use patterns, as shown below.
Add a specific file
git add README.md
Adds only README.md to staging. You can also add files from specific directories:
git add ./docs/README.md
This will add the file README.md in the docs directory to the staging environment.
Add multiple files
git add README.md index.html
This will add the files README.md and index.html to the staging environment.
Add files with a specific extension
git add ./*.md
The * wildcard matches all files with the specified extension in the current directory.
Add multiple files with different extensions
git add ./*.md ./*.txt
Adds all .md and .txt files in the current directory to staging.
Create .gitignore file
The .gitignore file tells Git which files and folders to ignore. When you run git add ., Git checks each file against .gitignore. Files listed there won't be added to the staging environment, and therefore won't be included in commits.
For example, if you have a node_modules folder in your project, you don't want to commit that folder to git. You can tell git to ignore that folder by adding node_modules to the .gitignore file.
Create a .gitignore file in the root directory and list the files/folders you want to ignore:
node_modules
.DS_Store
dist/
.env
This ignores the node_modules folder, .DS_Store file, dist folder, and .env file. You can also ignore files in specific subfolders:
docs/*.txt
node_modules?The node_modules folder contains all your project's dependencies and can be huge. Committing it would bloat your repository and slow down cloning. Since dependencies are listed in package.json, anyone can reinstall them with npm install.
In short, add any files or folders you don't want to commit to the .gitignore file, and Git will ignore them when staging.
Commit your changes
Now that you've added files to the staging environment, you can commit them. A commit saves your changes with a descriptive message. Use the git commit command:
git commit -m "Initial commit"
The -m flag specifies the commit message. Good commit messages help you and other developers understand what changed and why.
If you're committing for the first time, you need to configure your user.name and user.email:
For local configuration (specific to one repository):
git config user.name "yourusername"
git config user.email "email@example.com"
For global configuration (applies to all repositories):
git config --global user.name "yourusername"
git config --global user.email "email@example.com"
Local configuration overrides global configuration for that specific repository. Use global config for your default settings, and local config when you need different credentials for a specific project.
Create a new branch
Branches let you work on different versions of a repository simultaneously. By default, your repository has one primary branch (usually called master or main). You use branches to experiment and make changes before merging them into the primary branch.
After your first commit, you can create additional branches. There are two ways to do this:
1. git branch <branch-name>
git branch master
This will create a new branch master from the current commit, but will not switch to that branch. For that, you need to use the checkout command.
git checkout master
2. git checkout -b <branch-name>
git checkout -b master
This will create a new branch master from the current commit and switch to that branch.
Branch name must be unique, so you can't have two branches with the same name. If you try to create a branch with the same name as an existing branch, you'll get an error.
Now that you've created a new branch, you can see all the branches in your repository using the git branch command. You'd do something like:
git branch
This will show you all the branches in your repository and the one you're currently on will be marked with an asterisk like this:
* master
  my-branch
  another-branch
For now, you only have one branch, I showed other branches just to show you how it works. You'll have more branches as you work on your project.
Push Code to GitHub (The Main Event!) 🚀
You've made changes, committed them locally. Now it's time to upload them to GitHub so others can see!
Understanding git push
Think of push like uploading a file to Google Drive:
Local (Your Computer)         Remote (GitHub)
┌──────────────────┐         ┌──────────────────┐
│  master branch   │         │  master branch   │
│  ● commit 1      │         │  ● commit 1      │
│  ● commit 2      │─ push →│  ● commit 2      │
│  ● commit 3 (new)│         │  ● commit 3 ✨   │
└──────────────────┘         └──────────────────┘

Before push: GitHub doesn't have commit 3
After push: GitHub has all commits!
First Time Push (with -u flag)
First time pushing a branch? Use -u to set up tracking:
git push -u origin master
Breaking it down:
git push  -u      origin     master
   ↑      ↑         ↑          ↑
Command  Set    Remote     Branch
         tracking name      name
What does -u do?
- Sets up tracking between local and remote branch
- Future pushes can just use
git push - Creates permanent link
origin?origin is an alias (nickname) for your GitHub repository URL.
Instead of typing:
git push https://github.com/username/repo.git master
You can type:
git push origin master
Check your remotes:
git remote -v
Output:
origin  https://github.com/username/repo.git (fetch)
origin  https://github.com/username/repo.git (push)
Subsequent Pushes (After First Push)
After using -u once, pushing is simple:
git push
That's it! Git remembers where to push.
Push to Different Branch
Push to a specific branch:
git push origin feature-login
Visual:
Local                      Remote (GitHub)
feature-login  ──push──>  origin/feature-login
Complete Push Workflow Example
# 1. Check which branch you're on
git branch
# * master

# 2. Make sure code is committed
git status
# nothing to commit, working tree clean

# 3. Push to GitHub (first time)
git push -u origin master

# 4. Future pushes (tracking set up)
git push

# Success! ✅
When pushing for the first time, Git may ask for credentials:
- Username: Your GitHub username
- Password: Use a Personal Access Token (not your password!)
Getting a Personal Access Token:
- Go to GitHub → Settings → Developer settings → Personal access tokens
- Generate new token
- Copy and save it (you won't see it again!)
- Use this as your password when Git asks
Modern authentication: Use SSH keys or GitHub CLI for easier authentication.
Local vs Remote Branches 🌳
┌───────────────────────────────────────┐
│  LOCAL (Your Computer)                │
│  ┌─────────────┐                      │
│  │ master      │ ← Your work          │
│  │ feature-xyz │                      │
│  └─────────────┘                      │
└───────────────────────────────────────┘
              ↕ git push / git pull
┌───────────────────────────────────────┐
│  REMOTE (GitHub)                      │
│  ┌─────────────┐                      │
│  │ origin/master      │ ← Shared      │
│  │ origin/feature-xyz │               │
│  └─────────────┘                      │
└───────────────────────────────────────┘
Key differences:
| Aspect | Local Branch | Remote Branch |
|---|---|---|
| Location | Your computer | GitHub servers |
| Create | git branch name | git push origin name |
| See all | git branch | git branch -r |
| Access | Only you | Everyone with access |
origin vs upstreamWhen working with forks:
origin- Your forked repo (where you push)upstream- Original repo (where you pull updates)
Original Repo (upstream)
        ↓ fork
Your Fork (origin)
        ↓ clone
Your Computer (local)
Setup upstream:
git remote add upstream https://github.com/original/repo.git
git pull upstream main  # Get updates from original
Create a pull request (PR)
A pull request (or PR) is a way to alert a repo's owners that you want to make some changes to their code. It allows them to review the code and make sure it looks good before putting your changes on the primary branch.
To create a pull request, there should be two branches in your repo. One branch should be the primary branch (usually called master), and the other branch should be the branch you're working on and want to merge into the primary branch.
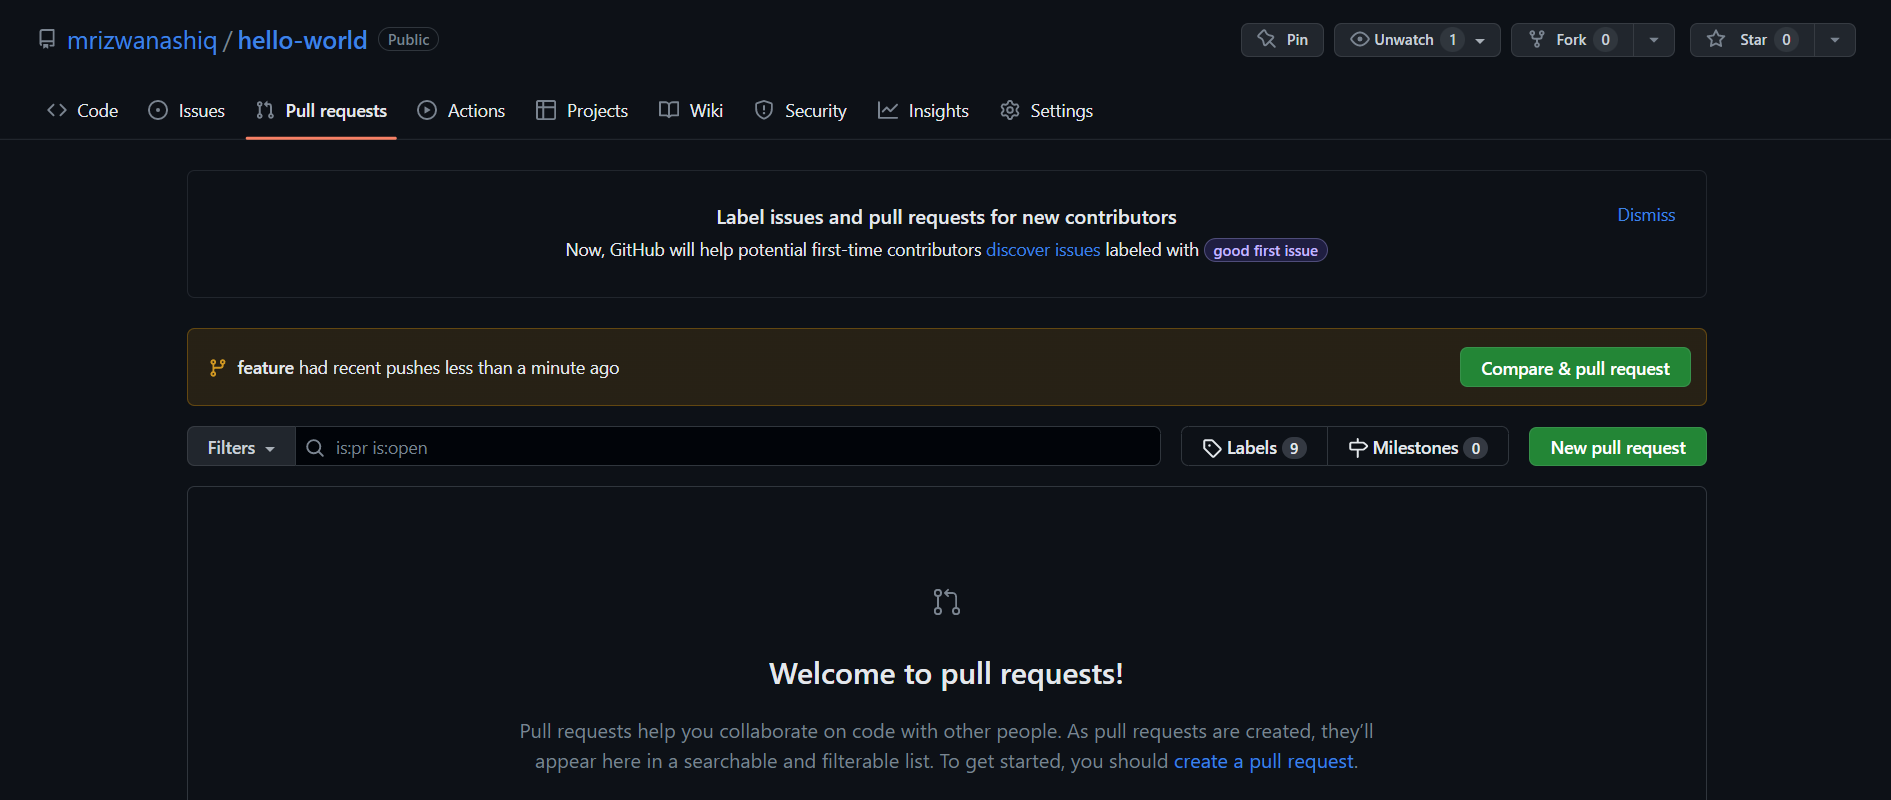
You can create a PR by going to the GitHub page for your repo and clicking the Pull requests tab:
Now you have two options:
- Click on the
Compare & pull requestbutton next to the branch you want to merge into the primary branch. - Click on the
New pull requestbutton and select the branch you want to merge into the primary branch.
You can use either option, but I prefer the second one because it gives you a better overview of the changes you're about to make.
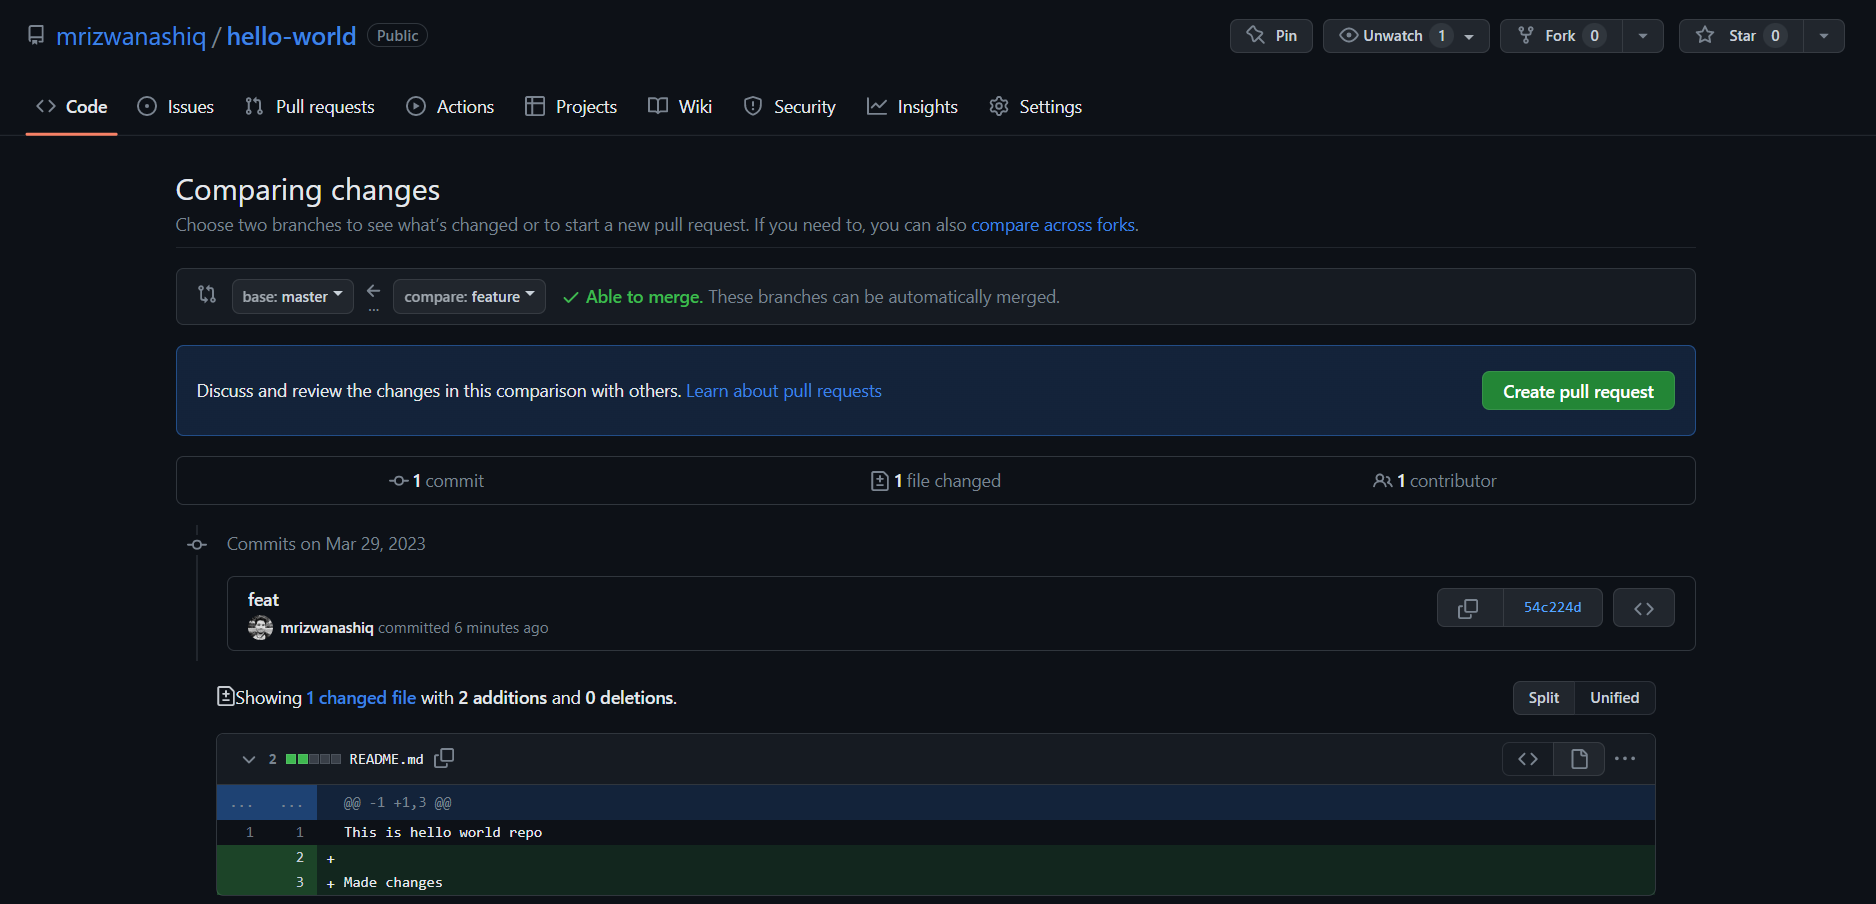
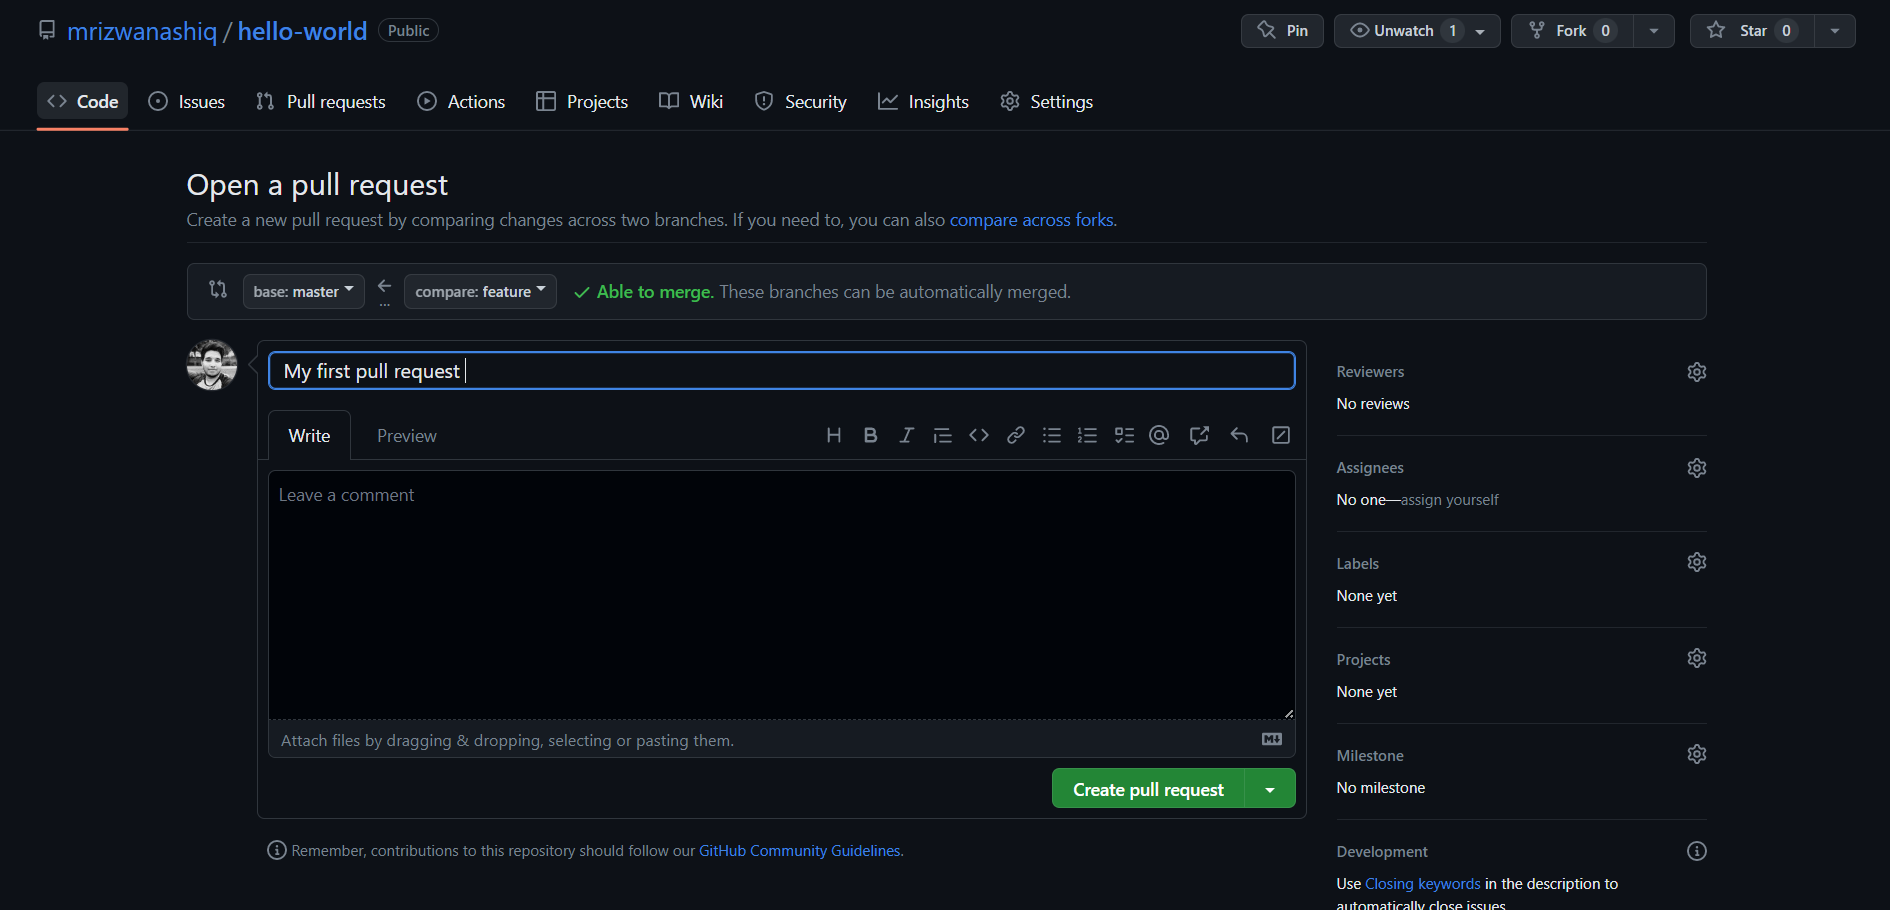
Now you can name your PR, add a description, assign it to a reviewer, if you want, etc. Once you're done, click the Create pull request button.
Now, the PR is created, and you can see it on the Pull requests tab of your repo and open it by clicking on it.
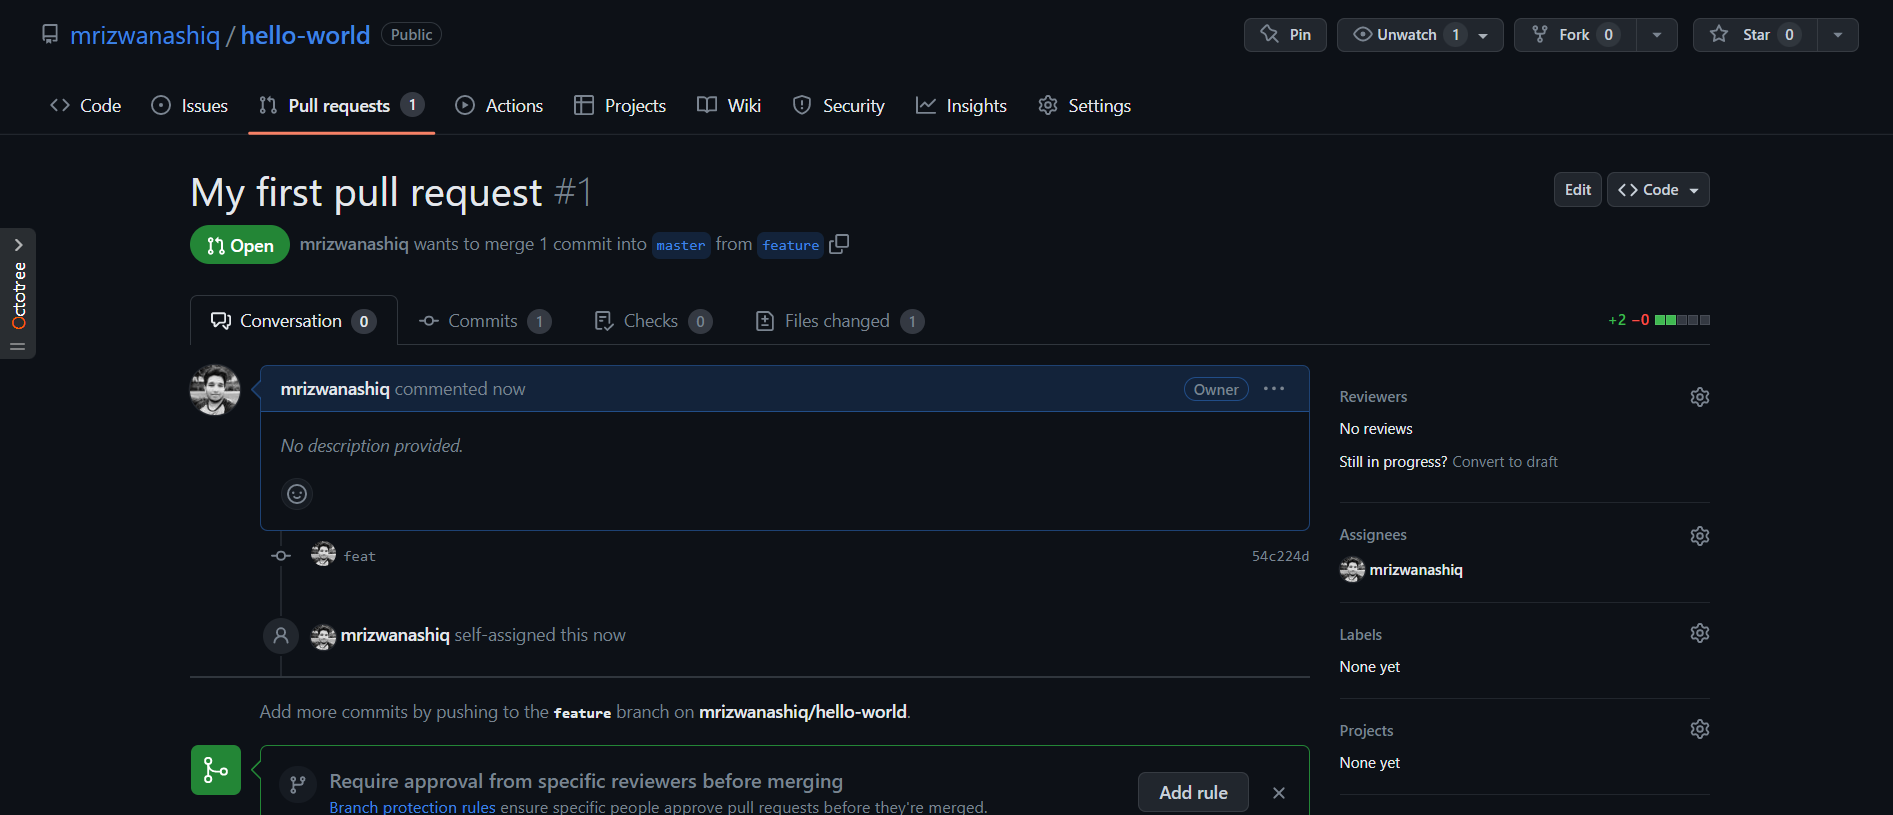
There are a few things you can do with a PR:
- You can add comments to the PR, which will be visible to the repo's owners.
- You can read the conversation, which will show you the comments and any other discussion that's happened on the PR.
- You can see the commits that are part of the PR.
- My favorite, you can see the changes that are part of the PR. This is a great way to review the code and make sure it looks good before merging it into the primary branch.
- You can merge the PR (if you have the right permissions) or close it if you don't want to merge it. We'll talk about merging a PR in the next section.
Even if you're the sole owner of a repo, creating PRs is still a good practice. It helps maintain a complete history of your changes and encourages the habit of using feature branches.
Merge a PR
To merge a PR, you need to have the right permissions. If you're the owner of the repo, you'll have the right permissions. If you're not the owner, maybe you're a contributor, you'll need to ask the owner to merge the PR for you.
Normally, PRs should be reviewed by someone else before they're merged. This is a good practice because it helps catch bugs and other issues before they're merged into the primary branch.
Go ahead and click the green Merge pull request button. This will merge your changes into the primary branch.
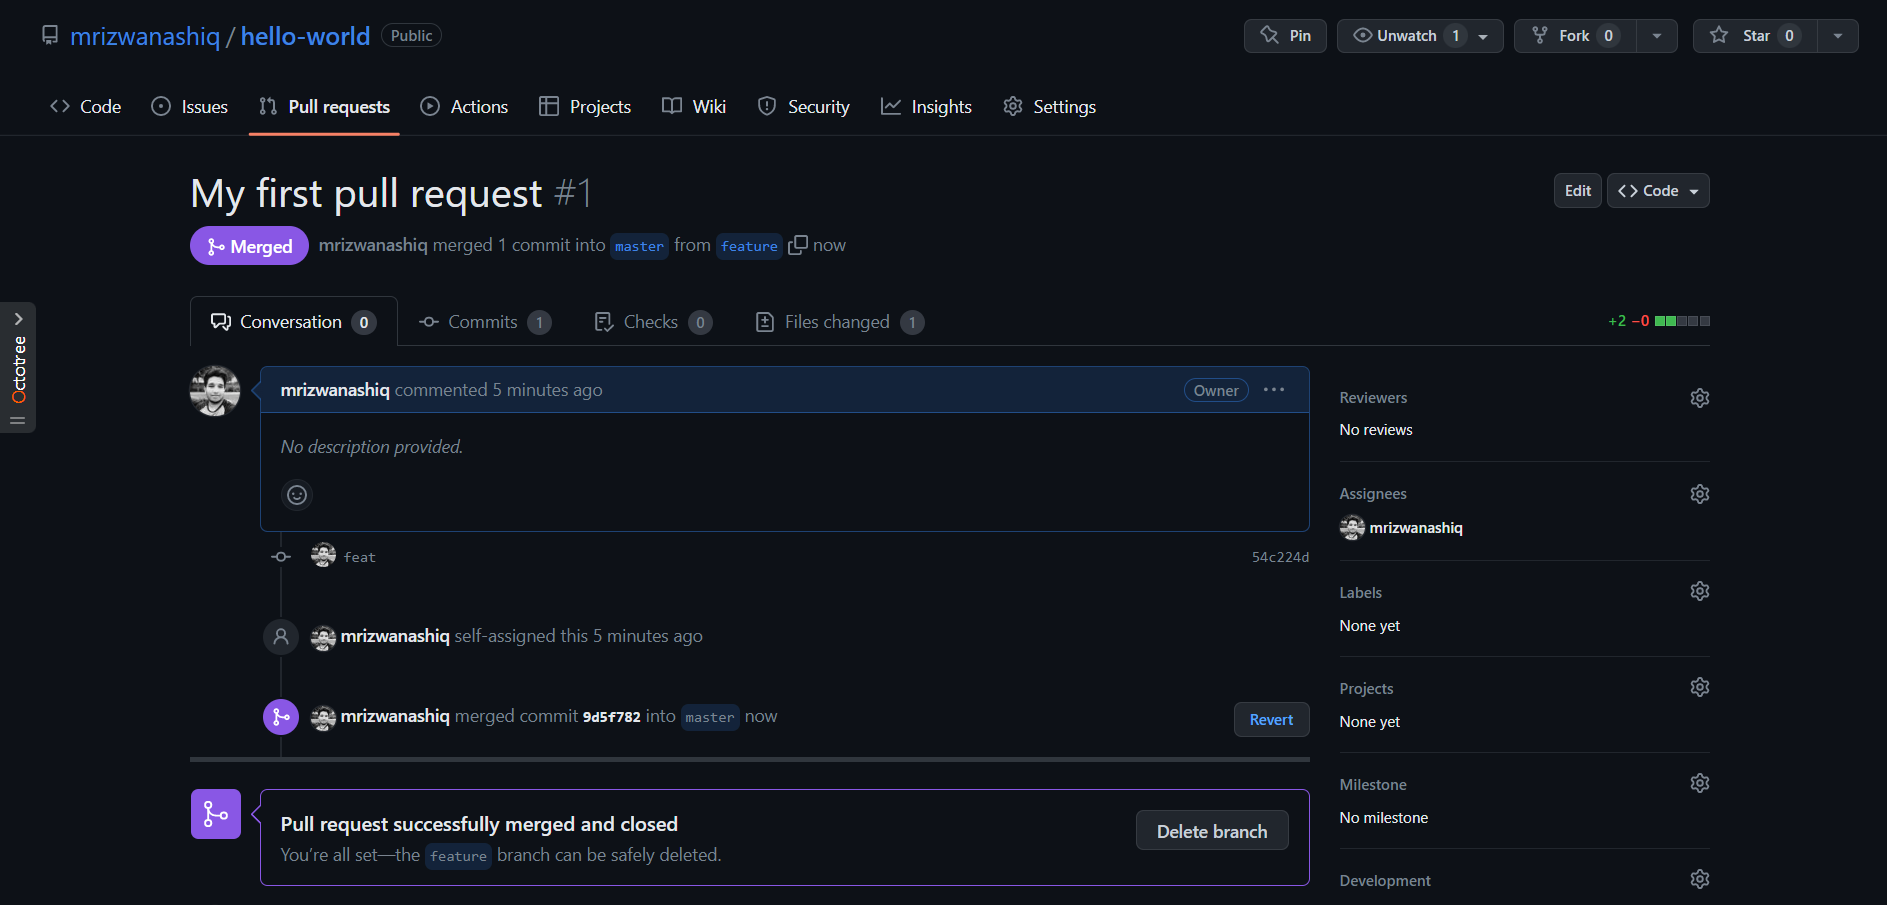
Once you merge the PR, you can delete the branch you were working on. This is a good idea because it keeps your repo clean and organized. You can delete the branch by clicking the 'Delete branch' button.
You can double-check that your commits were merged by clicking on the 'Commits' link on the first page of your new repo.
This will show you a list of all the commits in that branch. You can see the one I just merged right up top (Merge pull request #1).
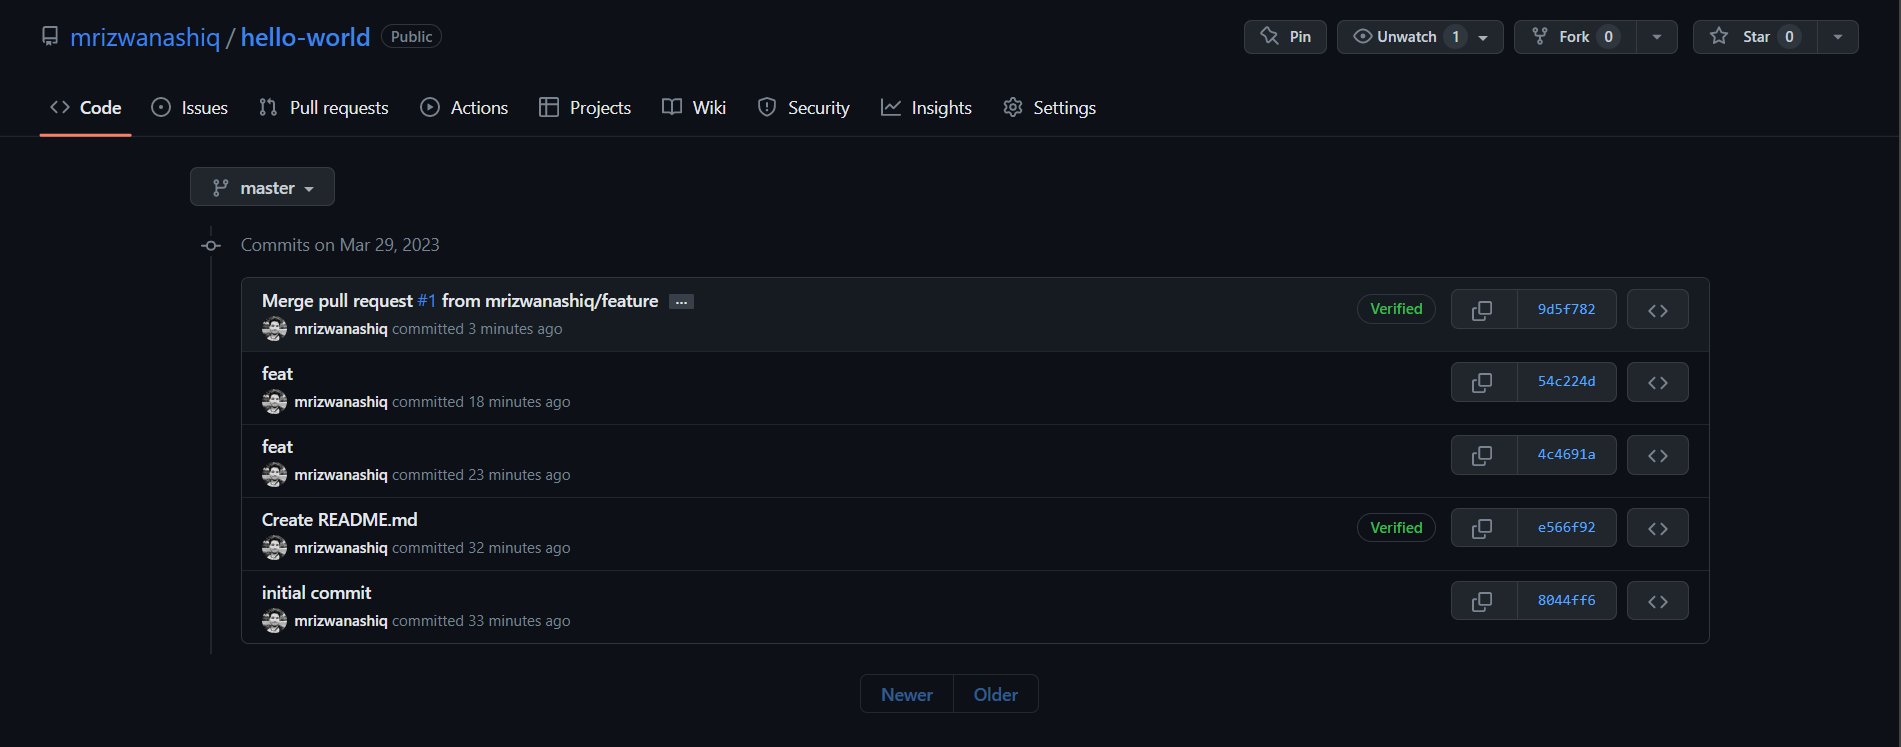
You can also see the hash code of the commit on the right hand side. A hash code is a unique identifier for that specific commit. It's useful for referring to specific commits and when undoing changes (use the git revert <hash code number> command to backtrack).
Pull the latest changes
After merging on GitHub, your local repository is out of sync. To get the latest changes from GitHub, use git pull:
git pull origin master
This pulls the latest changes from GitHub and merges them into your local branch.
Delete a branch
Delete a local branch:
git branch -d my-branch
Use -D (uppercase) to force-delete a branch that hasn't been merged.
Clone a repo
Clone a repository to your local machine:
git clone <repo-url>
Change the remote URL
If you need to change the remote URL (e.g., after forking or moving a repo):
git remote set-url origin <new-repo-url>
Quick Reference: Essential Commands 📋
Initial Setup (One Time)
# Configure Git
git config --global user.name "Your Name"
git config --global user.email "your@email.com"

# Initialize repository
git init

# Connect to GitHub
git remote add origin https://github.com/username/repo.git
Daily Workflow
# 1. Check status
git status

# 2. Stage changes
git add .                    # All files
git add filename.txt         # Specific file

# 3. Commit changes
git commit -m "Description of changes"

# 4. Push to GitHub
git push origin main         # First time
git push                     # After tracking set up
Branch Operations
# Create and switch to branch
git checkout -b feature-name
# Or modern way:
git switch -c feature-name

# List branches
git branch                   # Local branches
git branch -r                # Remote branches
git branch -a                # All branches

# Switch branches
git checkout main
# Or modern way:
git switch main

# Delete branch
git branch -d feature-name   # Safe delete (merged only)
git branch -D feature-name   # Force delete
Sync with GitHub
# Pull latest changes
git pull origin main

# Fetch without merging
git fetch origin

# Push all branches
git push --all origin
View Information
# View commit history
git log
git log --oneline           # Compact view

# View changes
git diff                    # Unstaged changes
git diff --staged           # Staged changes

# View remote info
git remote -v               # Show remote URLs
Common Workflows Cheat Sheet 🎯
Workflow 1: Start New Project
# 1. Create folder and navigate
mkdir my-project && cd my-project

# 2. Initialize Git
git init

# 3. Create files, then stage and commit
git add .
git commit -m "Initial commit"

# 4. Create GitHub repo, then connect
git remote add origin https://github.com/username/my-project.git

# 5. Push to GitHub
git push -u origin main
Workflow 2: Work on Feature
# 1. Create feature branch
git checkout -b feature-login

# 2. Make changes, then stage and commit
git add .
git commit -m "Add login functionality"

# 3. Push feature branch
git push -u origin feature-login

# 4. Create PR on GitHub
# (use GitHub web interface)

# 5. After PR is merged, switch back
git checkout main
git pull origin main

# 6. Delete feature branch
git branch -d feature-login
Workflow 3: Contribute to Existing Project
# 1. Clone repository
git clone https://github.com/username/repo.git
cd repo

# 2. Create feature branch
git checkout -b my-feature

# 3. Make changes, commit
git add .
git commit -m "Add my feature"

# 4. Push and create PR
git push -u origin my-feature
# Then create PR on GitHub
Troubleshooting Common Issues 🔧
Issue: "Permission denied"
# Solution: Check authentication
git remote -v
# Use HTTPS with token or set up SSH keys
Issue: "Your branch is behind 'origin/main'"
# Solution: Pull latest changes
git pull origin main
Issue: "Conflict" during merge
# Solution: Resolve conflicts manually
# 1. Open conflicted files
# 2. Look for <<<<<<< and >>>>>>>
# 3. Edit to keep desired changes
# 4. Stage and commit
git add .
git commit -m "Resolve merge conflicts"
Issue: Pushed wrong commit
# Solution: Revert the commit
git revert <commit-hash>
git push origin main
Key Takeaways 🎯
Remember: ✅ Local changes aren't on GitHub until you push ✅ Always commit before pushing ✅ Use branches for new features ✅ Pull before pushing to avoid conflicts ✅ Commit messages should be descriptive
The Basic Cycle:
Make changes → git add → git commit → git push
      ↑                                    ↓
      └──────── git pull ─────────────────┘
Next Steps:
- Learn about merge conflicts
- Explore branching strategies (Git Flow, GitHub Flow)
- Set up SSH keys for easier authentication
- Learn advanced Git commands (rebase, cherry-pick)
You're now ready to share your code with the world! 🚀
Conclusion
Congratulations! You've learned the Git and GitHub essentials:
✅ Creating repositories locally and on GitHub ✅ Staging and committing changes ✅ Pushing code to GitHub ✅ Working with branches ✅ Creating Pull Requests ✅ Collaborating with others
What you can do now:
- Host your projects on GitHub
- Collaborate with teams
- Track project history
- Contribute to open source
In advanced sections, we'll cover branching strategies, merge conflicts, rebasing, and more complex workflows. Keep practicing, and Git will become second nature!