API Calling
Before we learn how to call an API, let's first create a new collection in Postman.
Creating a Collection
A collection is a group of related requests. It is a way to organize your requests and keep them organized. To create a new collection, first, make sure you selected any workspace.
Steps to Select a Workspace:
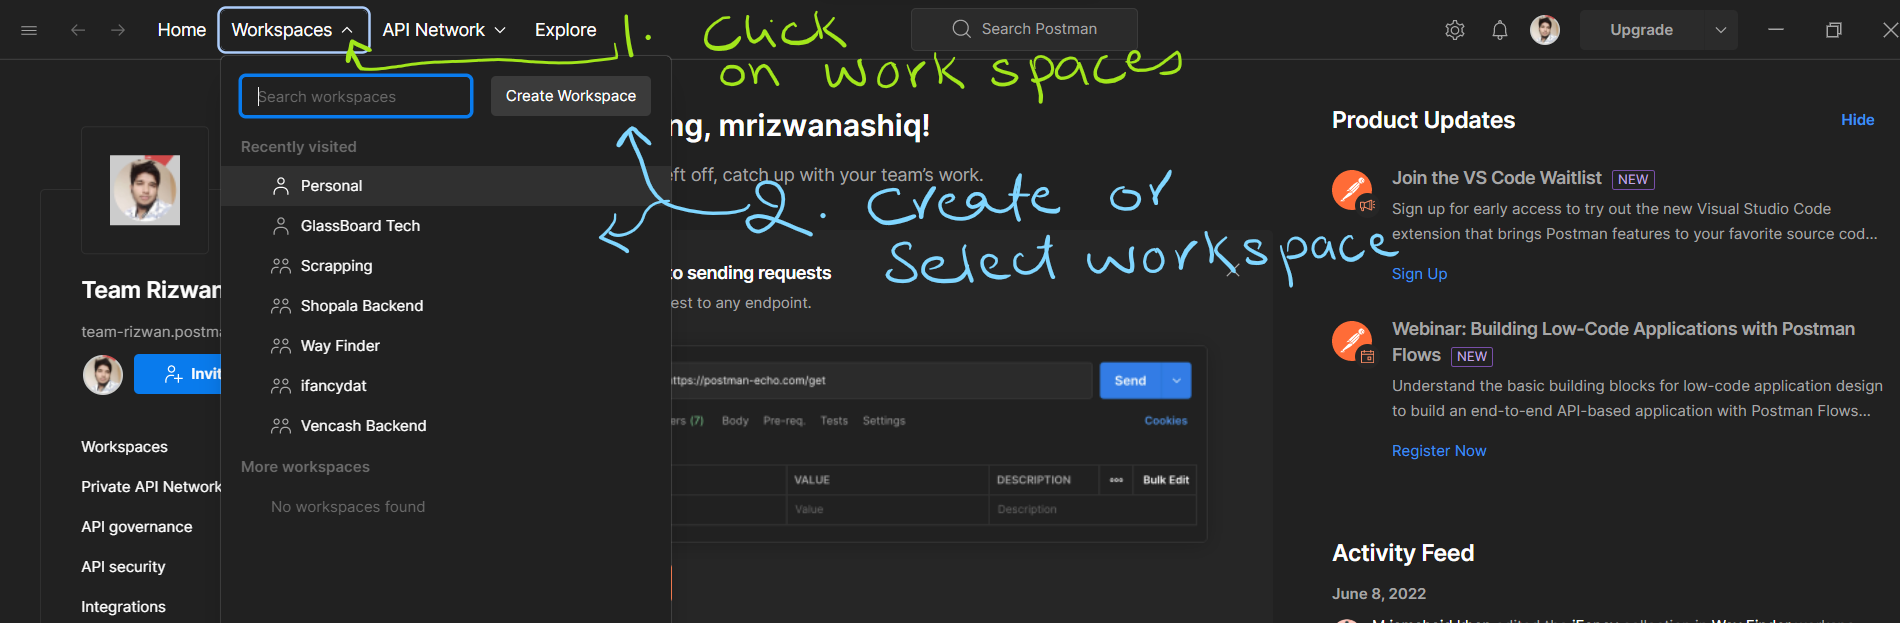
- Click on the
Workspacestab on the left sidebar. - Click on the
+ Newbutton to create a new workspace. - Enter a name for the workspace and click on the
Createbutton.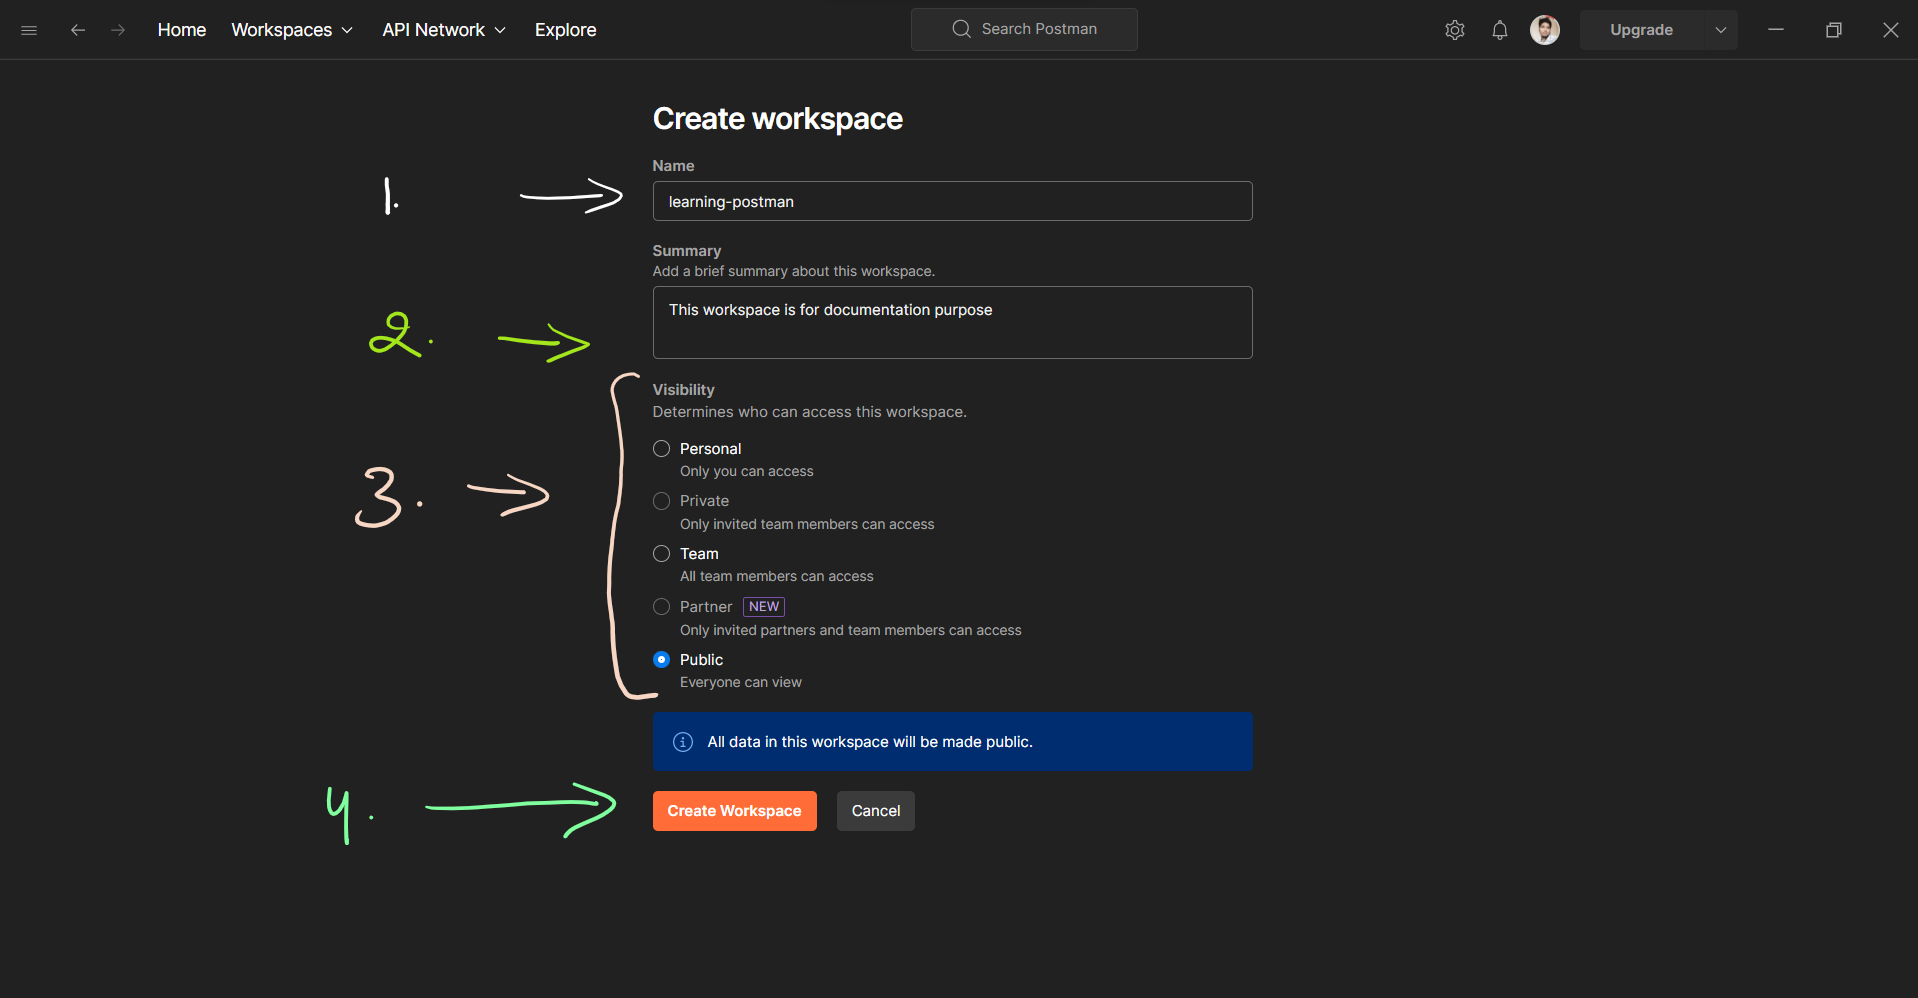
- Select the workspace you just created.
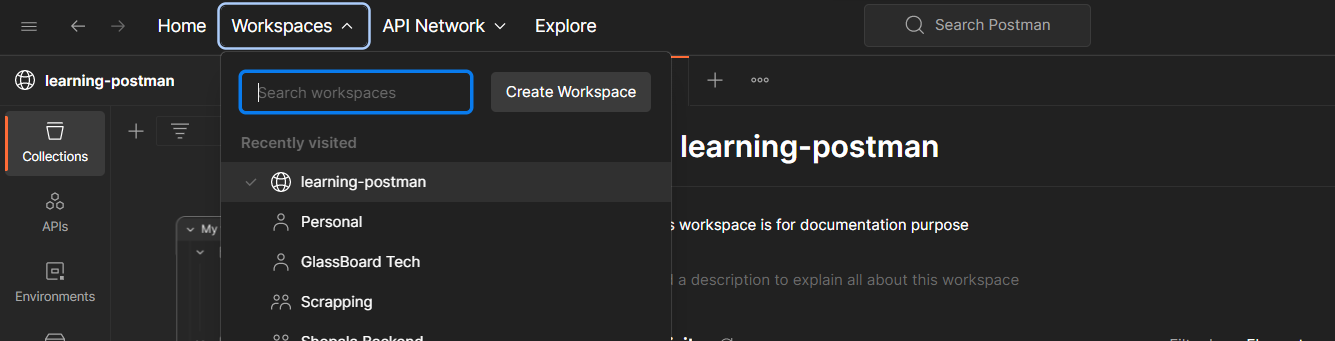
Now, let's create a new collection in the workspace.
- Click on the
Collectionstab on the left sidebar. - Click on the
+ Newbutton to create a new collection.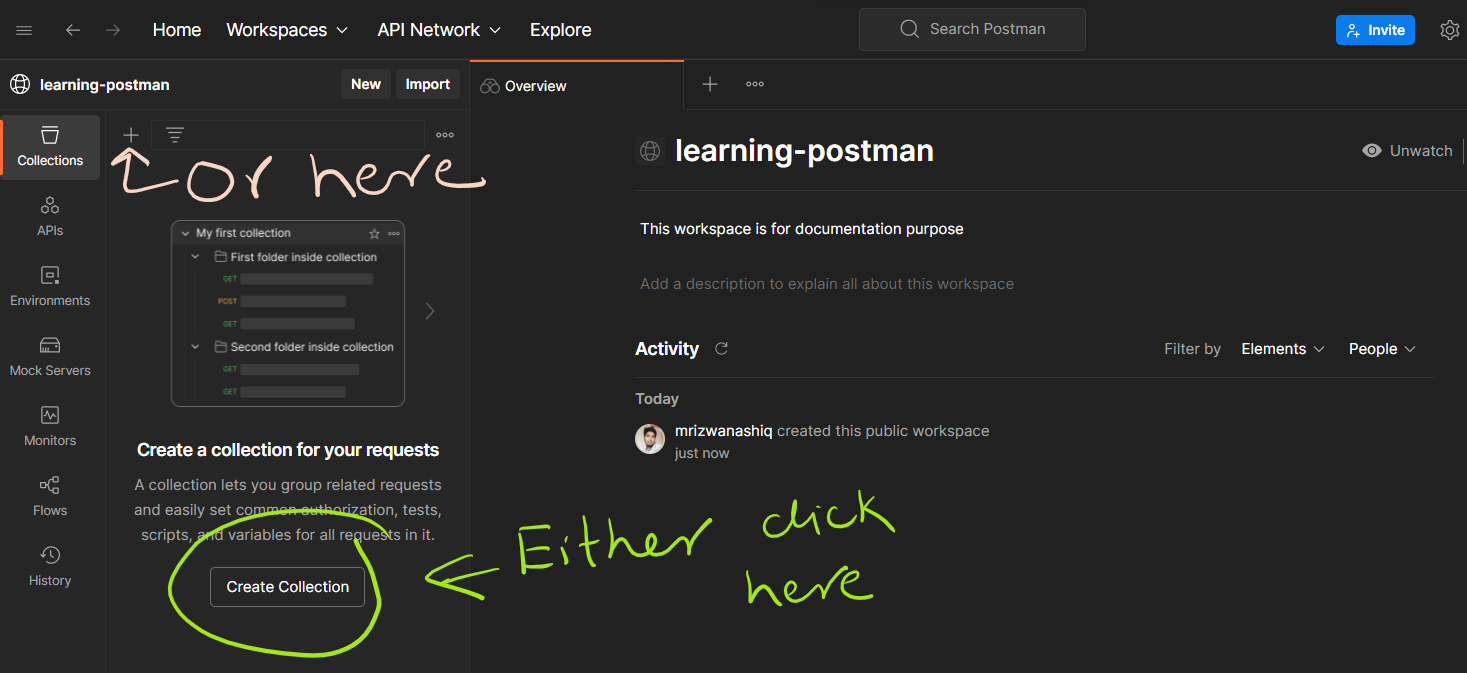
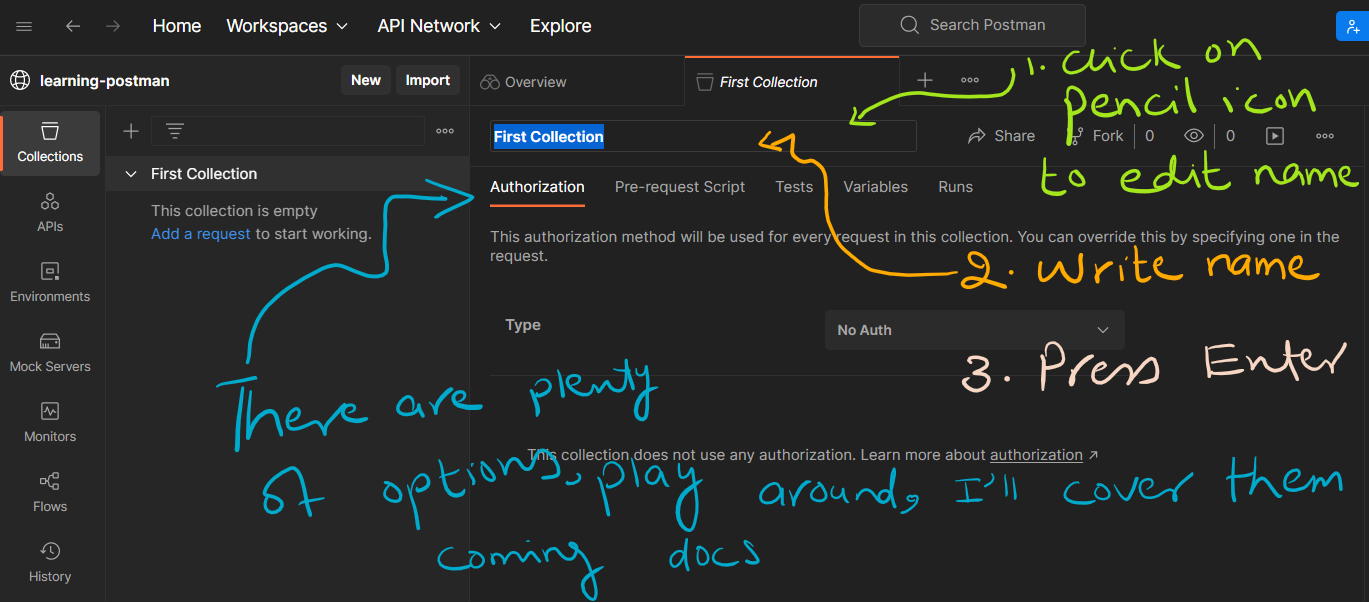
- Enter a name for the collection.
Create a Request
Created a collection? Great 🎉
Now, let's create a request in the collection to call an API.
Before going further, let's understand what a request is.
What is a Request?
A request is a message sent from the client to the server. It is used to request data from the server or perform an action on the server. The server then sends a response to the client.
Some requests are used to retrieve data from the server, and some requests are used to send data to the server. There are several types of requests, also known as HTTP methods.
What is an HTTP Method?
An HTTP method is a type of request used to perform a specific action on the server. There are several HTTP methods, including GET, POST, PUT, PATCH, and DELETE. There are several other HTTP methods, but these are the most commonly used methods.
Let's learn how to send a request using different HTTP methods. We'll use the JSONPlaceholder API to demonstrate how to send a request using different HTTP methods.
We'll use the same collection we created in the previous section. If you haven't created a collection, please follow the steps in the previous section to create a collection.
Let's start with the GET request.
GET Request
A GET request is used to retrieve data from the server. I will use the JSONPlaceholder API to demonstrate how to send a GET request.
- Click on the
Collectionstab on the left sidebar. - There are many ways to create a request, like
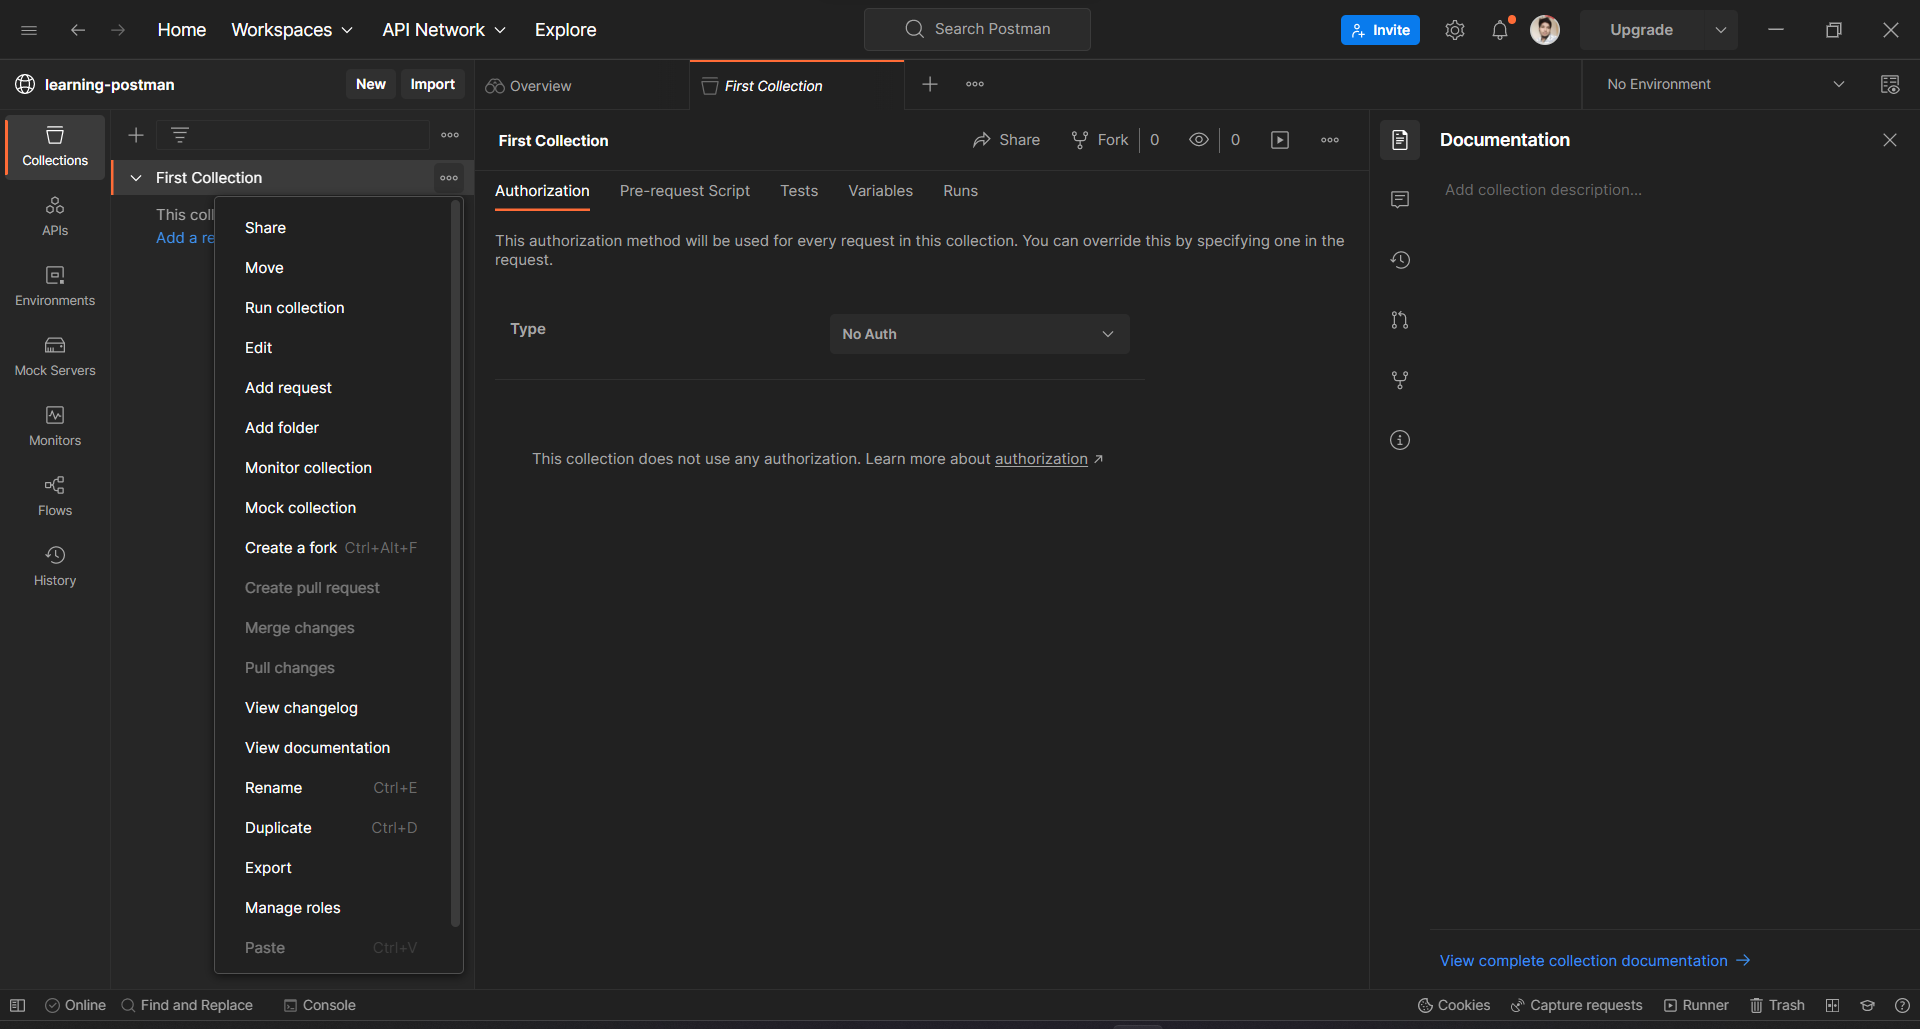
- Click on the Add Request button to create a new request.
- By default, the request method is GET, name New Request, and empty URL.
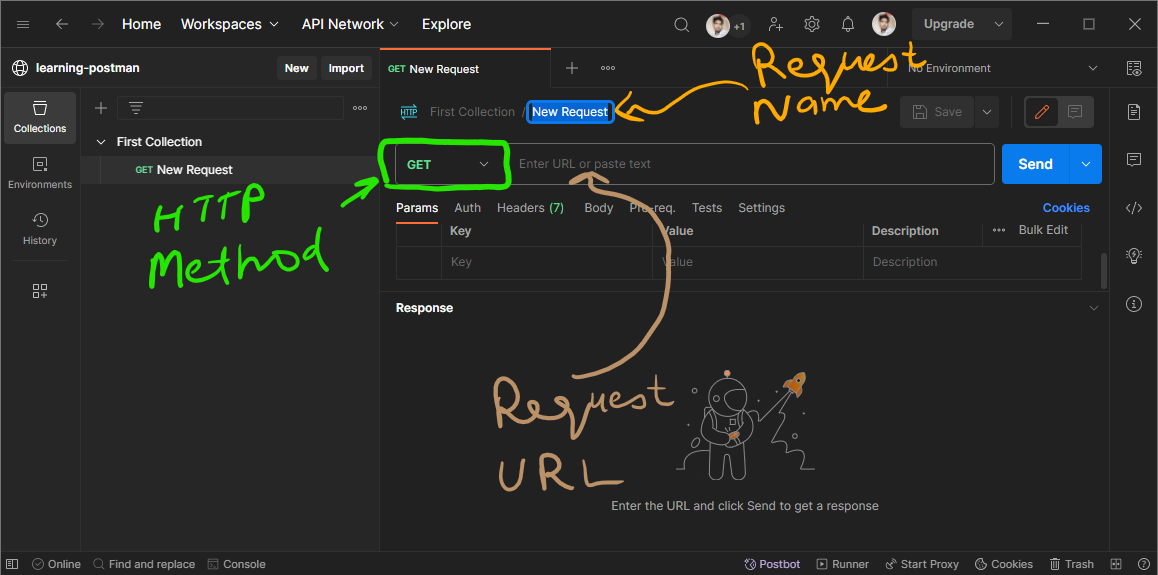
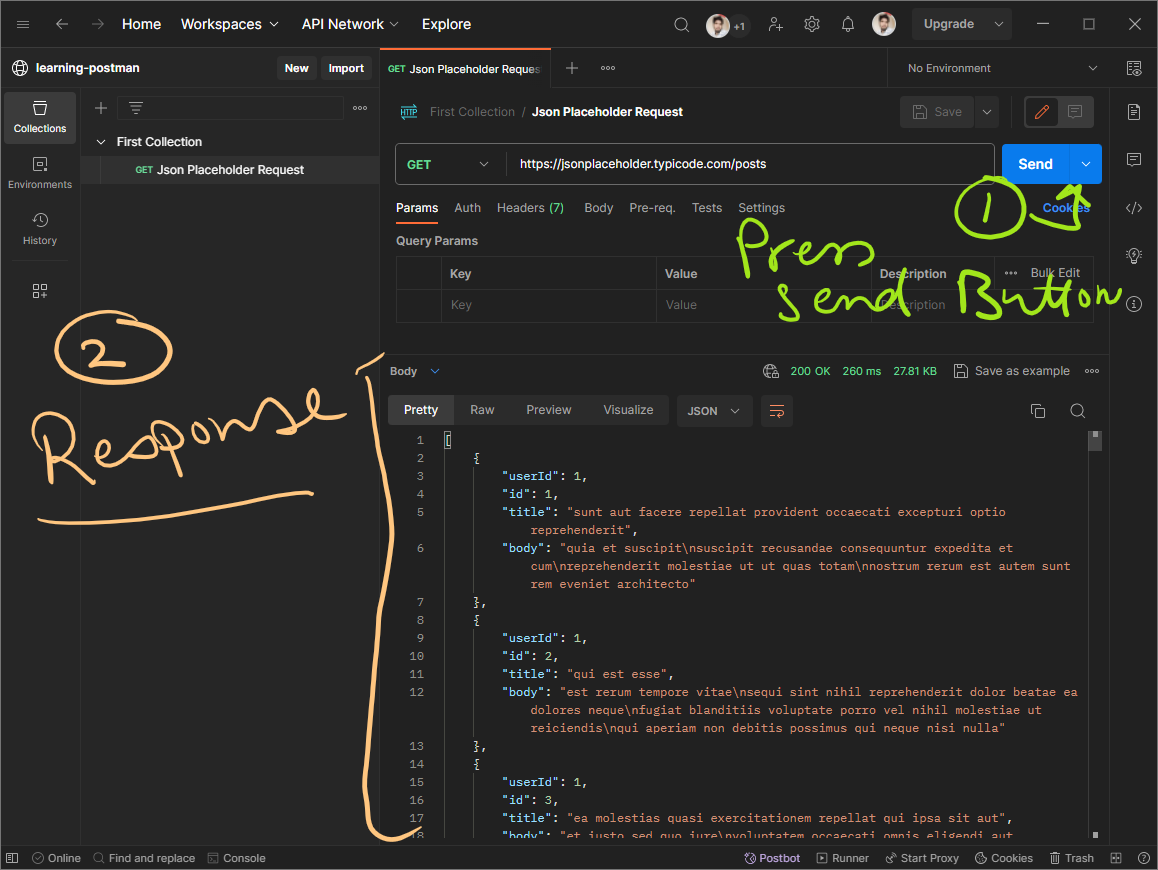
- I am going to name the request Get All Posts, put the URL https://jsonplaceholder.typicode.com/posts, and select the request method GET, and click on the Save button.

- Now, click on the Send button to send the request, and you will see the response in the Body tab.
You can also send a request by pressing Ctrl + Enter.
POST Request
A POST request is used to create a new resource. I will again use the JSONPlaceholder API to demonstrate how to send a POST request.
- On the left sidebar, click on the
Collectionstab. Right-click on theFirst Collection. - Click on the
Add Requestbutton to create a new request. - Name the request
Create a Post, put the URL https://jsonplaceholder.typicode.com/posts, and select the request methodPOST. - Click on the
Bodytab, selectraw, andJSONfrom the dropdown. - Enter the following JSON data in the body.
{"title": "foo","body": "bar","userId": 1}
- Click on the
Sendbutton to send the request, and you will see the response in theBodytab. - You will see the response status code
201 Createdand the response body with the newly created post. - You can also see the response headers in the
Headerstab.
PATCH Request
A PATCH request is used to update a resource. Will use the PATCH method to update the post we created in the previous section.
- Again, right-click on the
First Collectionon the left sidebar. - Click on the
Add Requestbutton to create a new request. - Name the request
Update a Post, put the URL https://jsonplaceholder.typicode.com/posts/1, and select the request methodPATCH. - Click on the
Bodytab, selectraw, andJSONfrom the dropdown. - Enter the following JSON data in the body.
{"title": "foo","body": "bar","userId": 1}
- Click on the
Sendbutton to send the request, and you will see the response in theBodytab. - You will see the response status code
200 OKand the response body with the updated post. - You can also see the response headers in the
Headerstab. - You can also see the updated post in the
Get All Postsrequest.
PUT Request
PUT requests are similar to PATCH requests. The only difference is that PUT requests replace the existing resource with the new resource, whereas PATCH requests update the existing resource with the new resource.
- Right-click on the
First Collectionon the left sidebar. - Click on the
Add Requestbutton to create a new request. - Name the request
Replace a Post, put the URL https://jsonplaceholder.typicode.com/posts/1, and select the request method PUT. - Click on the
Bodytab, selectraw, andJSONfrom the dropdown. - Enter the following JSON data in the body.
{"title": "foo","body": "bar","userId": 1}
- Click on the
Sendbutton to send the request, and you will see the response in theBodytab. - You will see the response status code
200 OKand the response body with the replaced post.
DELETE Request
DELETE requests are used to delete a resource.
- Right-click on the
First Collectionon the left sidebar. - Click on the
Add Requestbutton to create a new request. - Name the request
Delete a Post, put the URL https://jsonplaceholder.typicode.com/posts/1, and select the request methodDELETE. - Click on the
Sendbutton to send the request, and you will see the response in theBodytab. - You will see the response status code
200 OKand the response body with an empty object. - You can also see the response headers in the
Headerstab. - You can also see the deleted post in the
Get All Postsrequest. - You can also see the deleted post in the
Get a Postrequest.
What is coming next?
In the next article, we will learn how to use Postman to test APIs. But here we have only a few requests. What if we have hundreds of requests? How do we organize them? We will learn how to organize requests in the next article.
Conclusion
In this article, we learned how to create a collection and create requests in the collection. We also learned how to send requests using different HTTP methods.